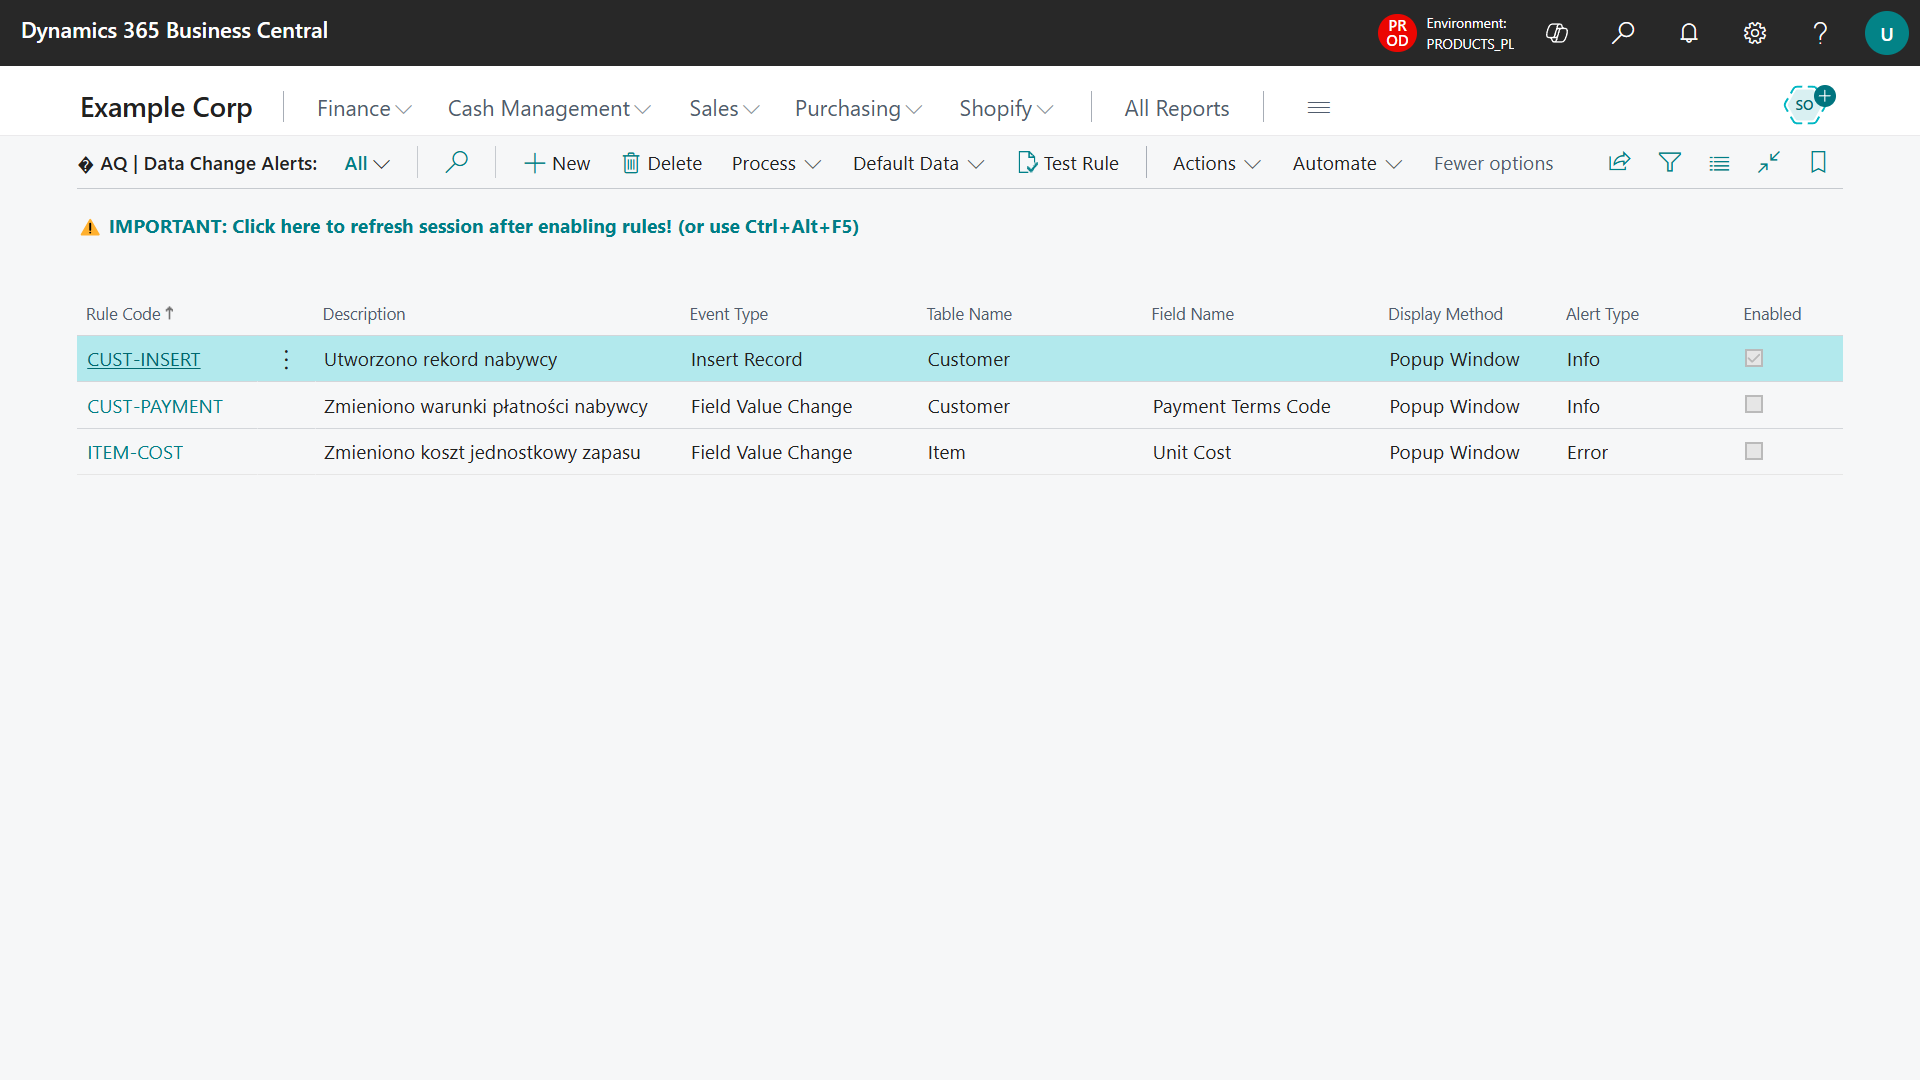
Setting Up Data Change Alerts
This guide will help you step by step configure alerts that will notify you about important changes in the Busines Central system.
How to get started?
- In Business Central search for "Data Change Alert Rules"
- Open the "AQ | Data Change Alerts" page
Creating a new alert
Step 1: Basic information
- Click New to create a new rule
- Enter Rule Code - a short name (e.g., "NEW-CUSTOMER" or "PRICE-CHANGE")
- Add Description - write what this alert should do (e.g., "Notifies about new customers")
- Don't enable the rule immediately - first configure and test it
Step 2: Choose what you want to monitor
Option A: New data (Insert Record)
When to choose: You want to know when you add something new
How to configure:
- Event Type: Choose Insert Record
- Table No.: Choose table (e.g., Customer)
- Message Text: "New customer added: %1 - %2"
Option B: Data deletion (Delete Record)
When to choose: You want to prevent deletion of important data
How to configure:
- Event Type: Choose Delete Record
- Table No.: Choose table
- Alert Type: Error (will stop deletion) or Info (only notify)
- Message Text: "Cannot delete customer: %1 - %2"
Option C: Changes to specific information (Field Value Change)
When to choose: You want to track changes to specific data
How to configure:
- Event Type: Choose Field Value Change
- Table No.: Choose table (e.g., Item)
- Field No.: Choose specific field (e.g., Unit Price)
- Message Text: "Changed price %1: %OLDVALUE% → %NEWVALUE%"
Step 3: Choose notification type
Information notification (Info)
- Only informs, doesn't interrupt work
- Good for tracking changes
- User clicks "OK" and continues working
Error notification (Error)
- Stops the action and requires a decision
- Good for blocking unwanted actions
- User must do something to continue
Writing message text
Basic placeholders:
- %1, %2, %3 - Insert main record information (code, name, etc.)
- %FIELDNAME% - Name of the field that changed
- %OLDVALUE% - Old value
- %NEWVALUE% - New value
Examples of texts:
For new customers:
"🎉 New customer in system: %1 - %2"
For price changes:
"� Item price changed %1: was %OLDVALUE%, now %NEWVALUE%"
For errors:
"❌ STOP! You cannot delete %1 - %2. This may affect other data!"
How to test alerts?
Before enabling an alert live, always test it:
- Open your alert rule
- Click Test Rule
- See how the alert would look
- If something's wrong - fix and test again
- When satisfied - enable the alert
⚠️ IMPORTANT: Session refresh after enabling rules
After enabling or changing alert rules you MUST refresh the system session for the changes to be loaded:
- Use the Ctrl+Alt+F5 key combination (recommended)
- Or click the session refresh button on the rules page
Without refreshing the session, new rules may not work correctly!
Troubleshooting
Alert not triggering:
- Verify the rule is enabled
- MOST IMPORTANT: Check if you refreshed the session after enabling the rule (Ctrl+Alt+F5)
- Check table and field numbers are correct
- Ensure proper permissions for the monitored table
- Test the rule using the Test Rule function