Email Notifications Setup
This document provides comprehensive steps for setting up email notifications for job queues in Business Central.
Email Account and Scenario Setup
Before configuring notifications, you must set up an email account and associate it with the error notification scenario:
Go to the Email Accounts page in Dynamics 365 Business Central.
If the list is empty, add a new email account.

Choose a specific account to serve as the sender for notification emails.
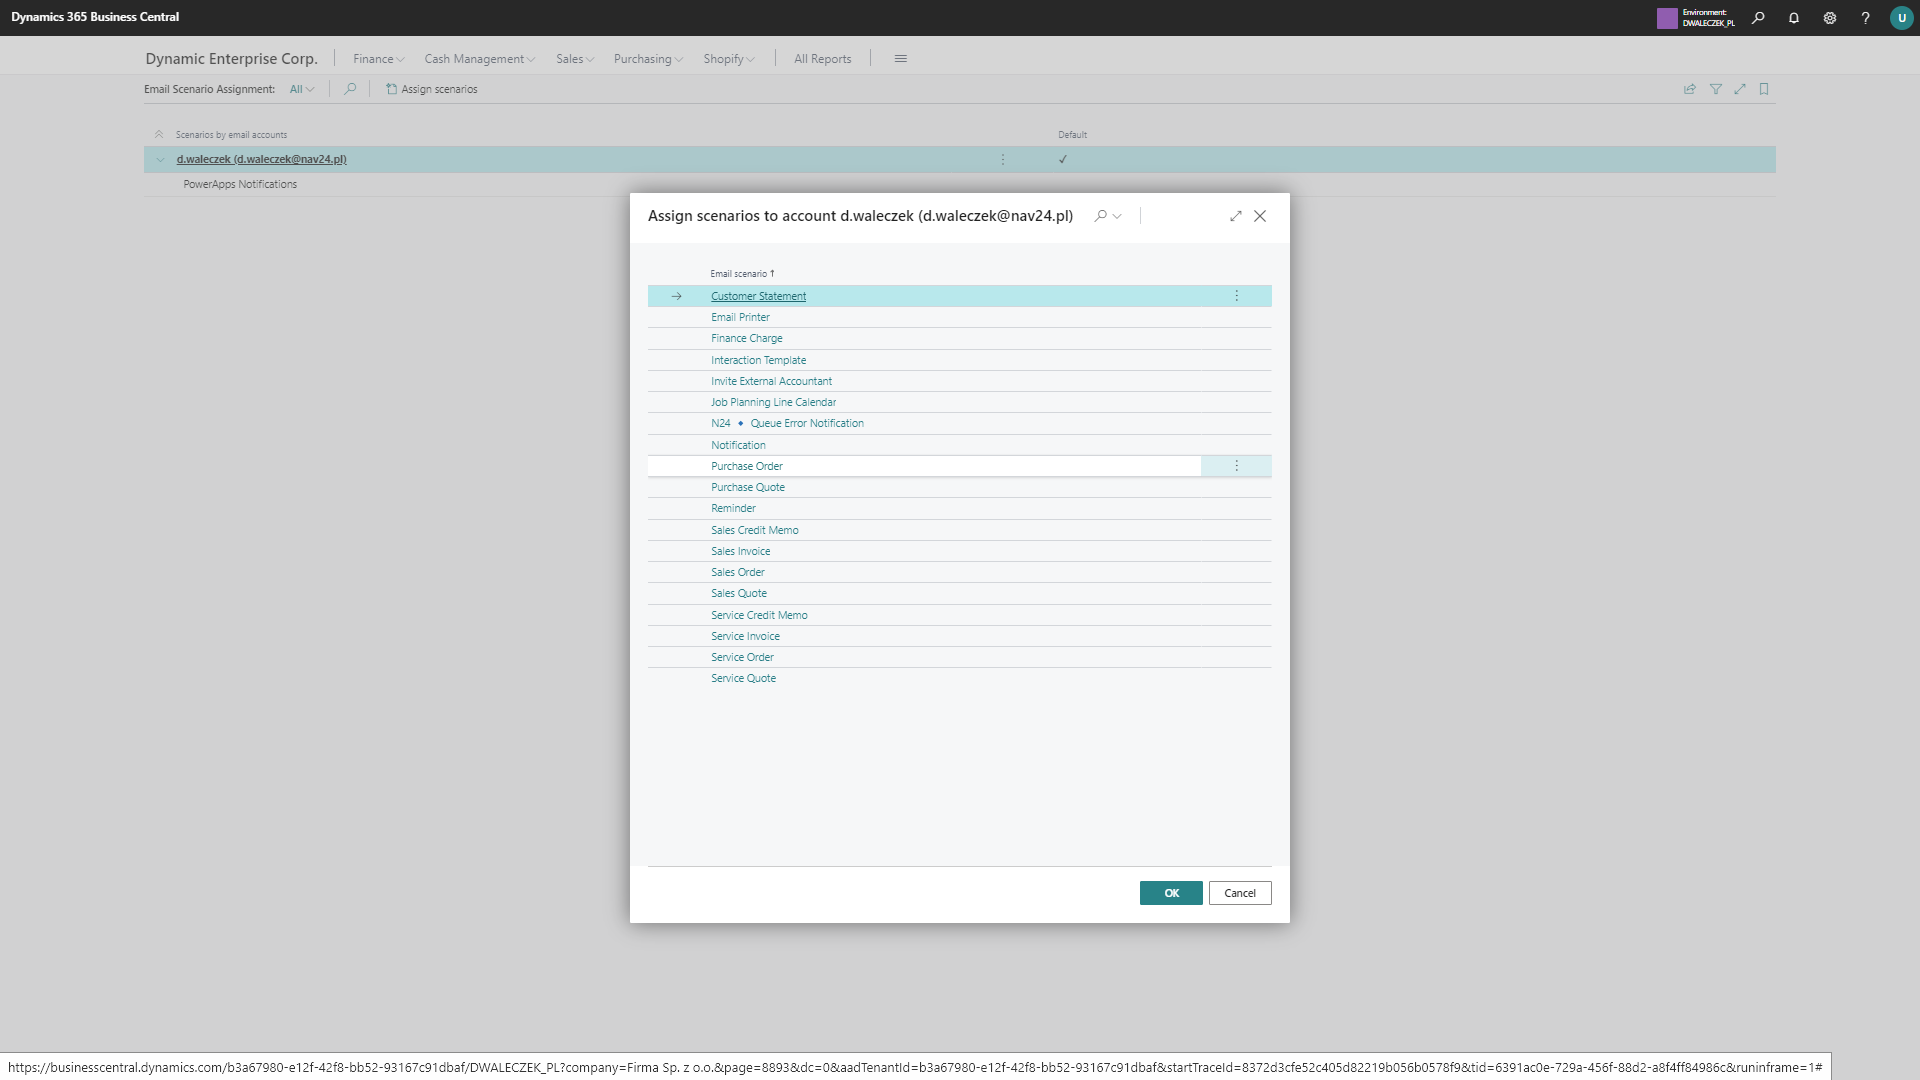
To use the email account for sending notifications, navigate to Navigate and locate the Email Scenarios action.
On the Email Scenario Assignment page, click the Assign Scenarios action.
Assign the N24 🔹 Queue Error Notification scenario to the selected email account.
Assign Notification Recipients
After setting up the email account and scenario, you need to assign recipients who will receive error notifications:
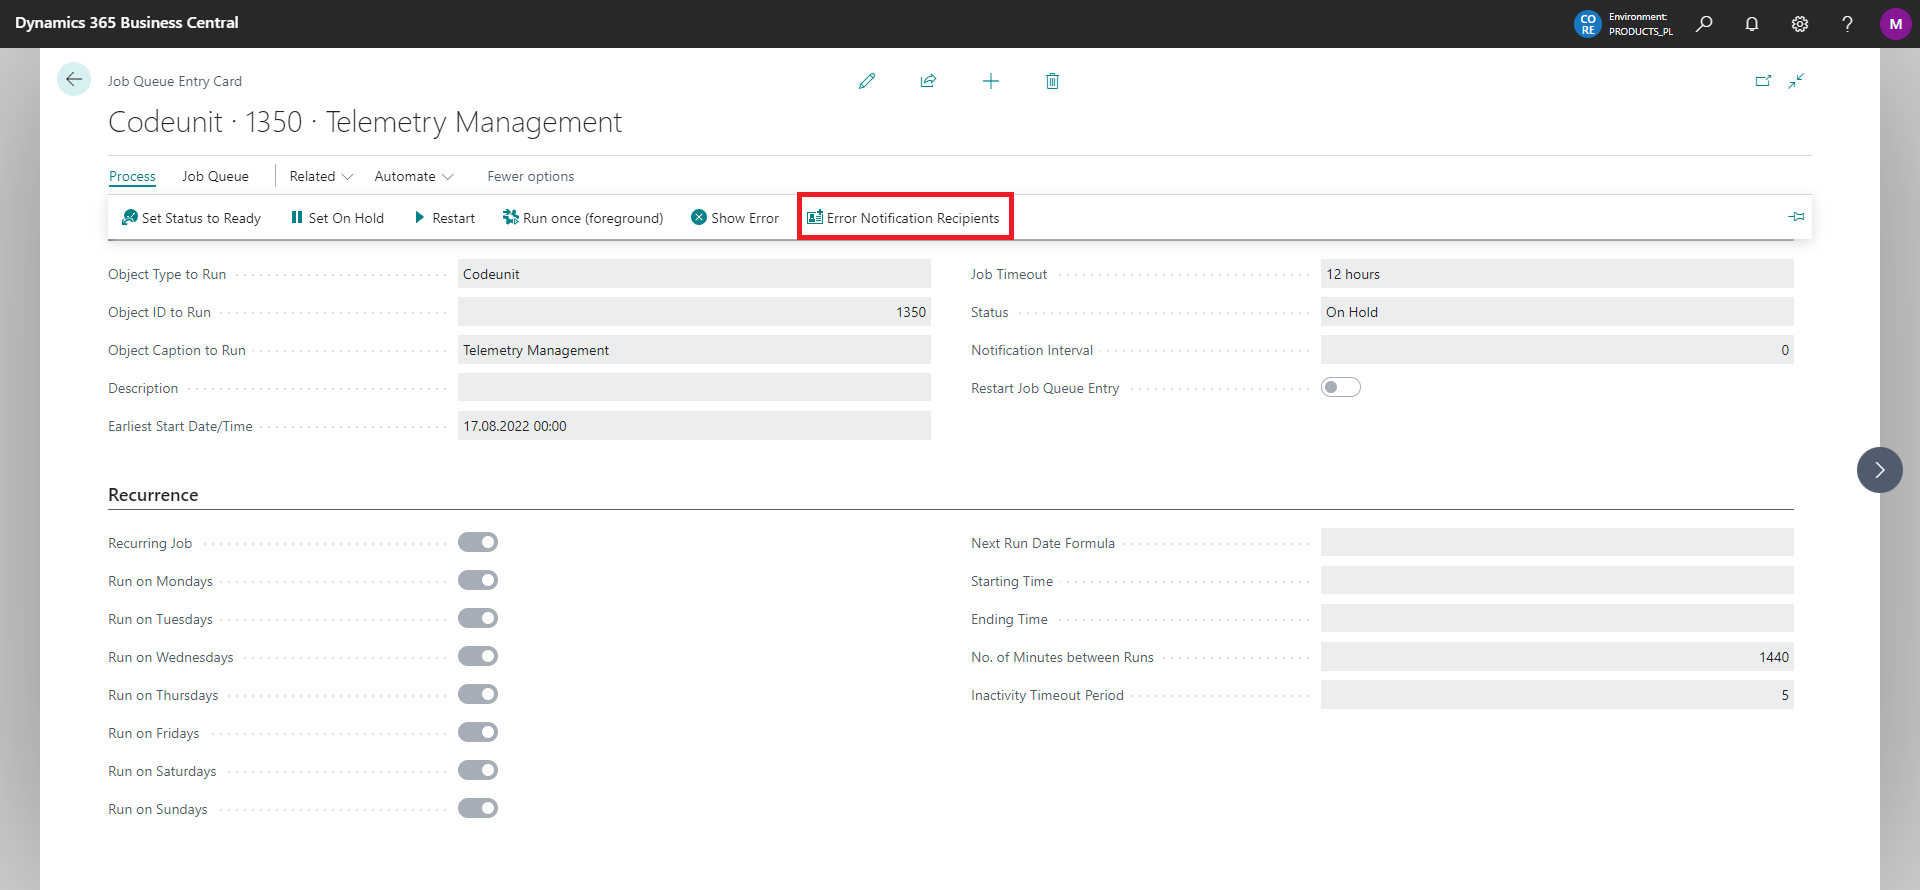
Navigate to the Job Queue Entries list.

Select the Job Queue for which you want to configure notifications and open it.
Locate the Process group on the action bar, and choose Error Notification Recipients.
In the newly opened list, specify users and their corresponding email addresses.

Adding Yourself As Recipient
On the Error Notification Recipients page, you'll find an action labeled Add Me as Recipient. This action streamlines the process by automatically creating a new entry with your user and email address.
All Recipients List
To view all available error notification recipients, locate the ⚙️ Advanced Queues Configuration | Nav24 page using the search bar. Click on Functionalities and then navigate to All Error Email Recipients.
Notification Language Setup
On the Error Notification Recipients page, you can configure the language for notifications:
- Use the Language Code column to specify the preferred language for each recipient.
- This allows you to configure different languages for various users within the scope of a single job queue.
Tip
Currently, we support two languages: Polish and English. If no language is defined or the specified language is not supported, notifications will default to English.
Notification Interval Configuration
To control how frequently error notifications are sent:
- Open the Job Queue Entry card for the desired queue.
- Locate the Notification Interval field.
- Set the frequency (in minutes) at which error notifications will be dispatched.
Tip
When you set the interval to 60 minutes, the system will wait for a minimum of 60 minutes before sending the next notification. This means you'll receive the first error that occurs after this time period.