Advanced Queues - Getting Started
This page will help you configure the N24 Advanced Queues product in the Microsoft Dynamics 365 Business Central system. Proper configuration of settings and permissions is essential to fully use the solution.
1. Permissions
Permissions are assigned automatically upon the initial installation of the extension. All users are granted the N24AQ - VIEW permission set, allowing them to view the extension's data without the ability to modify it. If any user in the system is permitted to create or initiate queues, the automatic restart functionality will be applied.
Here are the available permissions:
N24AQ - VIEW: Provides read-only access to the entire extension. Enables the automated restart of any queue. Cannot modify extension's data.N24AQ - ADMIN: Includes permissions to access the configuration functions, set up email recipients, and make changes to the extension configuration.
Warning
Remember to assign at least the N24AQ - VIEW permission set when adding a new user responsible for running the queues. Failure to assign this permission will result in queues not restarting automatically and recipients not receiving email notifications.
2. Associate Email Account with Scenario
- Go to the Email Accounts page in Dynamics 365 Business Central.
- If the list is empty or you don't see any appropriate e-mail account, add a new email account.

- Choose a specific account to serve as the sender for notification emails.
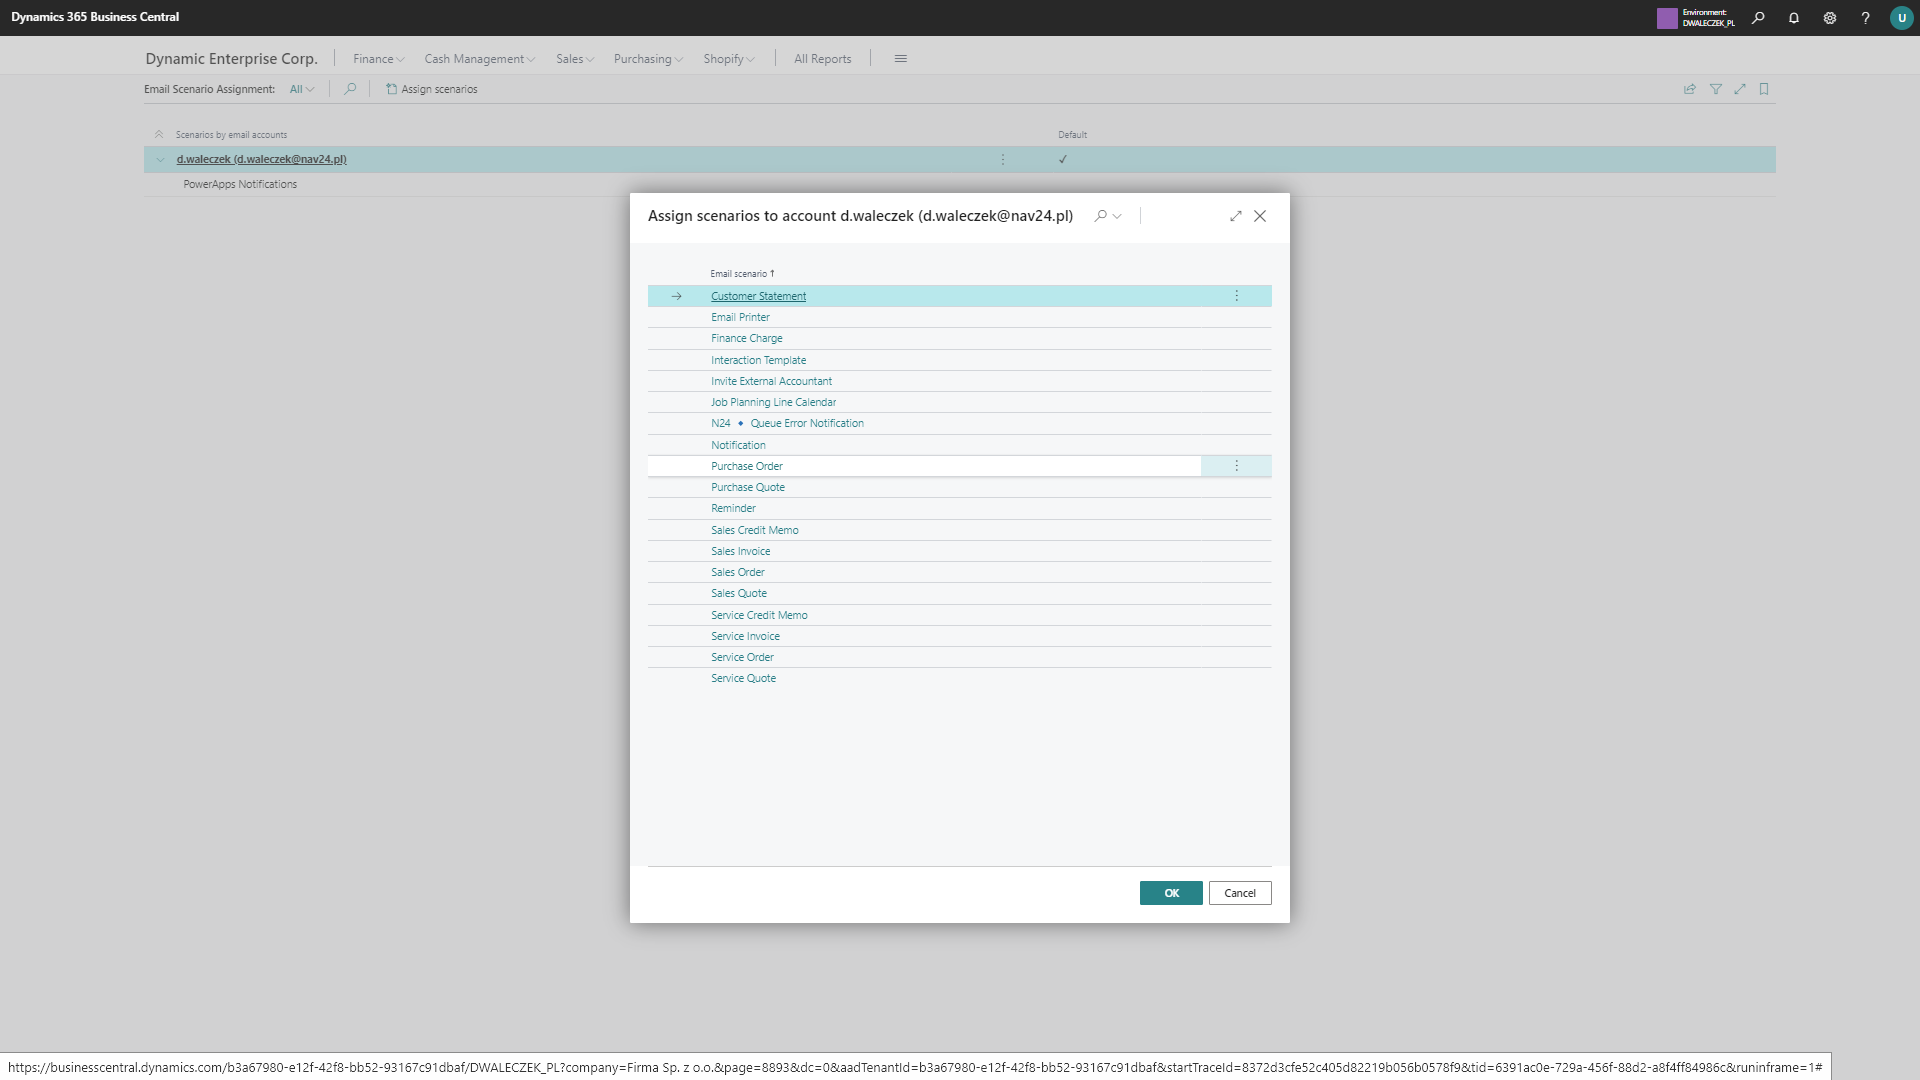
- To use the email account for sending notifications, associate it with the appropriate email scenario. Click on the Navigate and locate Email Scenarios action.
- On the Email Scenario Assignment page click the Assign Scenarios action.
- Assign the N24 🔹 Queue Error Notification scenario to the selected email account.
3. Enable Automatic Restart
- Navigate to the Job Queue Entries page. Select and open the card page of the queue that you want to be restarted automatically.

- If the queue is already running in the background, you have to set it on hold.
- Locate the Auto Restart on Error and enable it.
- You can set the queue back to the running state by clicking the Set Status to Ready action found within Process group.
4. Enable Auto-Restart Queue
Sometimes, especially during Microsoft updates, queues fail and are not restarted. To prevent such situations, we have created a queue responsible for restarting other queues if the initial restart mechanism fails.
- Open ⚙️ AQ | Advanced Queues Setup, then in the Advanced Queues section, select the row named Restart Errored Queues.
- Click Create action, then run it by clicking Yes.
Warning
Delegated users cannot start queues. Use a local account or an approval flow if configured.
- Once enabled, the technical queue will restart every 5 minutes. It will restart other queues if they fail to restart for any reason. In case of such a restart, no email notification will be sent!
5. Assign Notification Recipients
- Navigate to the Job Queue Entries.
- Select the Job Queue for which you want to configure notifications and open it.
- Locate the Process group on the action bar, and then choose Error Notification Recipients.
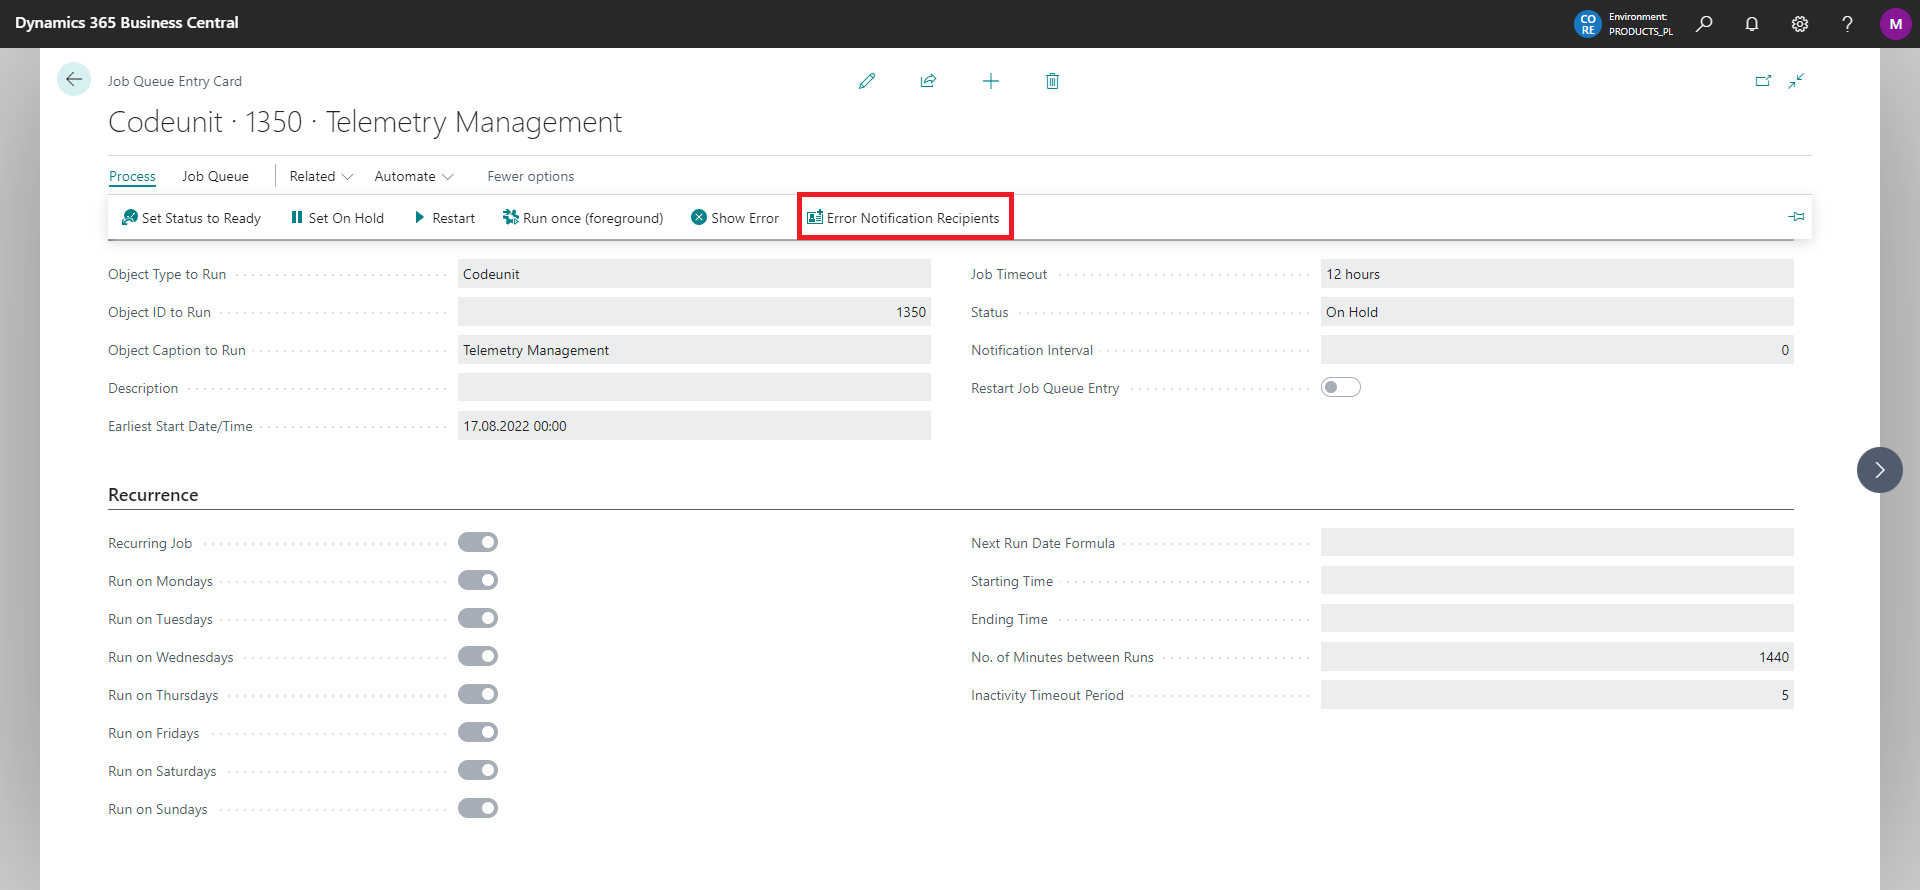
- In the newly opened list, specify users and their corresponding email addresses.

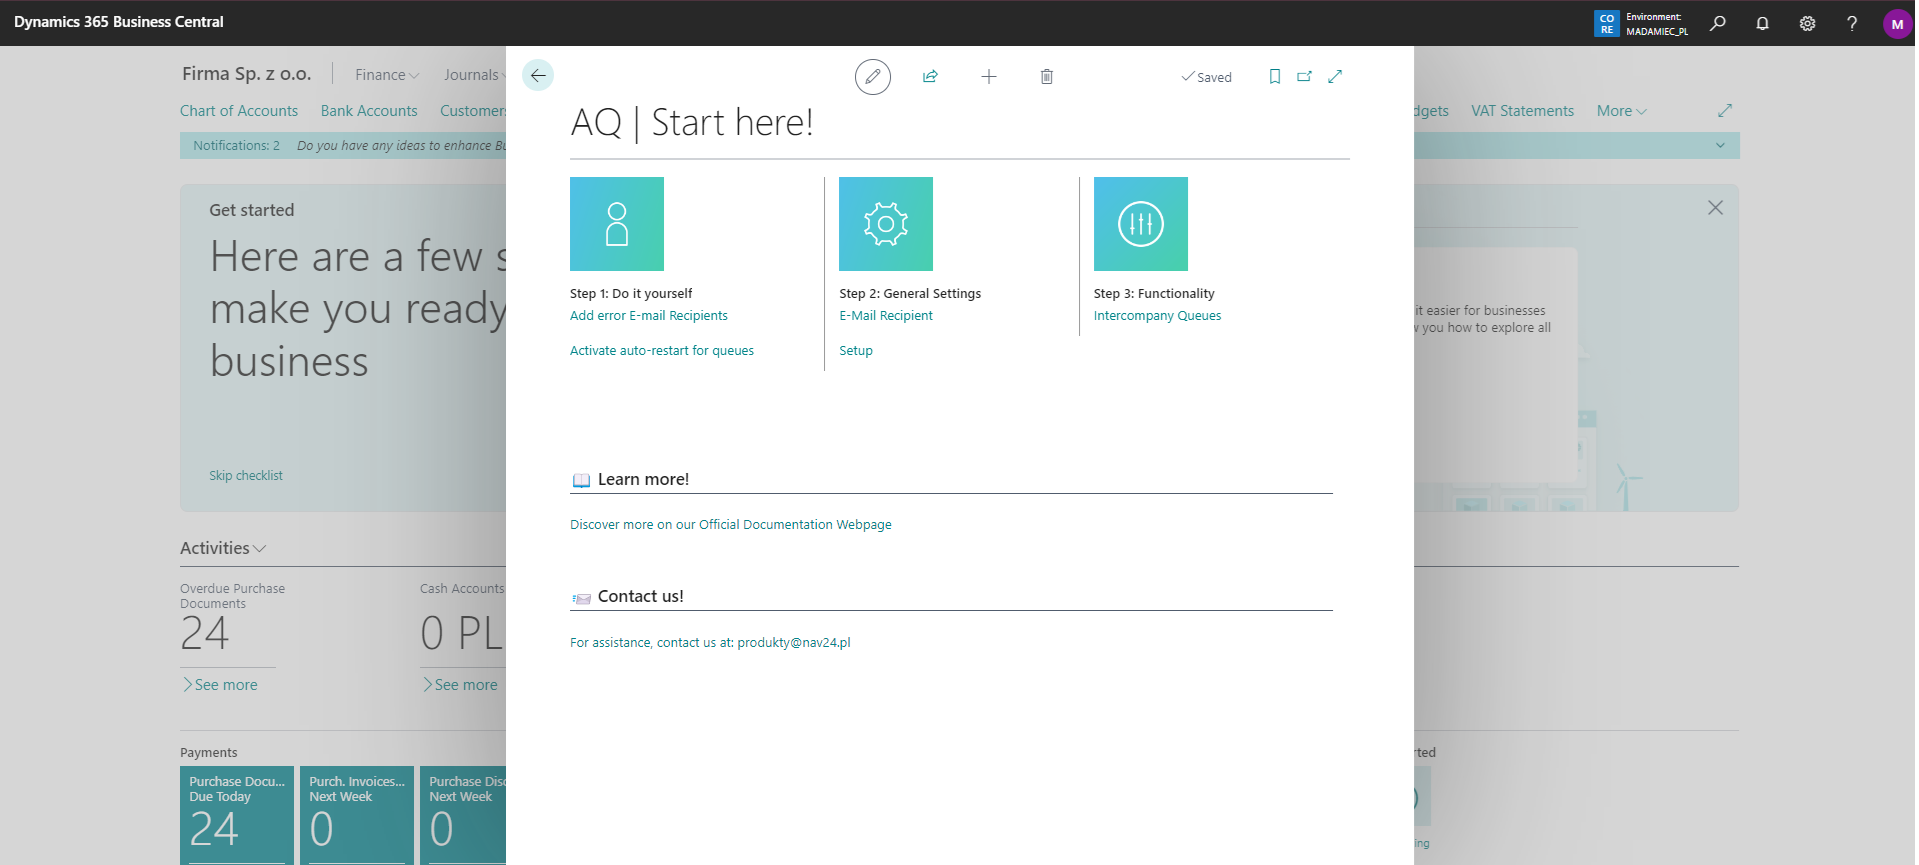
Start Page
The page allows quick access to all settings from one place. You can access it directly by searching for it by name ⚙️ AQ | Start here!, by finding it on the Assisted Setup page, or by clicking on the Manage ➡️ Set up action on the Extension Management page.