Balance Sheet Settings
Batch Selection
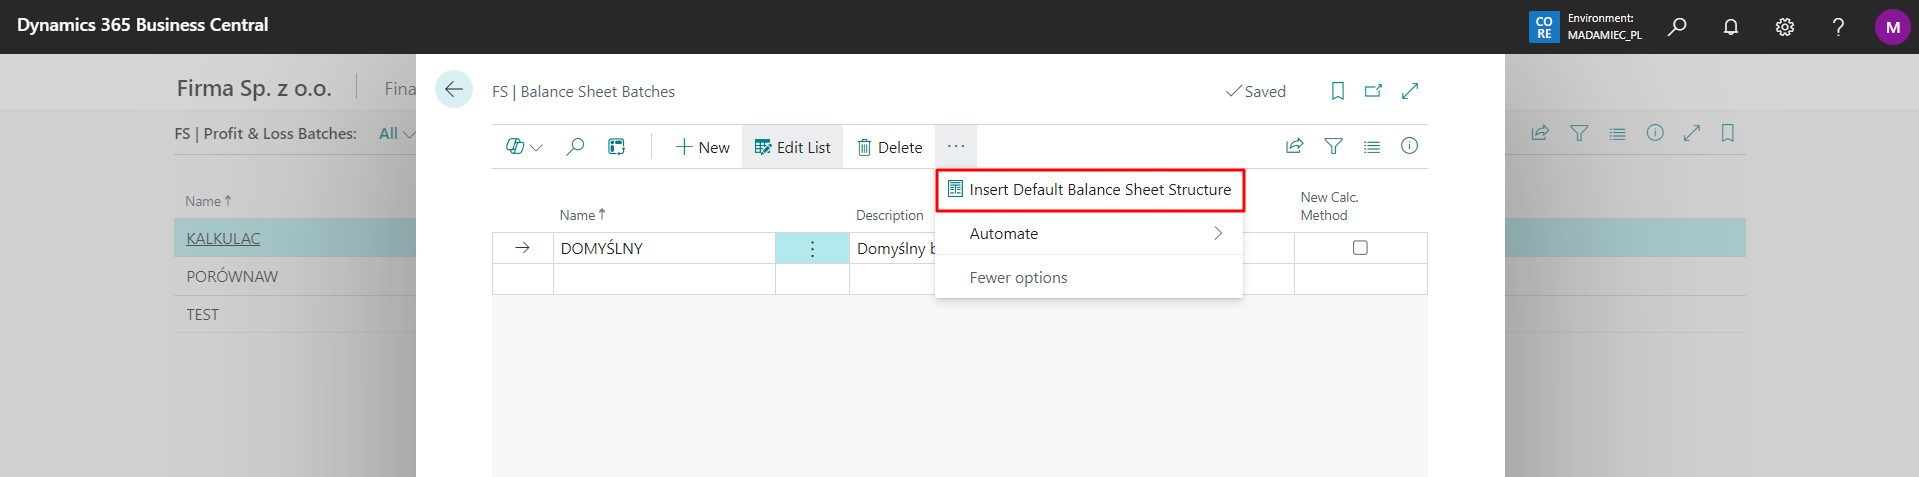
Defining the Balance Sheet should begin with the creation of at least one Balance Sheet Batch.

Inserting the Default Structure
For each batch, by using the Insert Default Balance Structure action, we can assign a ready-made balance structure. From this level, we can also decide whether we want to load the structure in PLK or ENU language.
Sample Report
After installing the extension, it is possible to initialize it with a sample report. To do this, run the Generate Balance action.

After initiating the action, the user has the option to choose the language in which the sample report will be created. The available choices are:
- PLK
- ENU.

Note
The generated reports differ not only in language but also in layout.
Sample reports will also be generated for the Profit and Loss Statement.
Structure
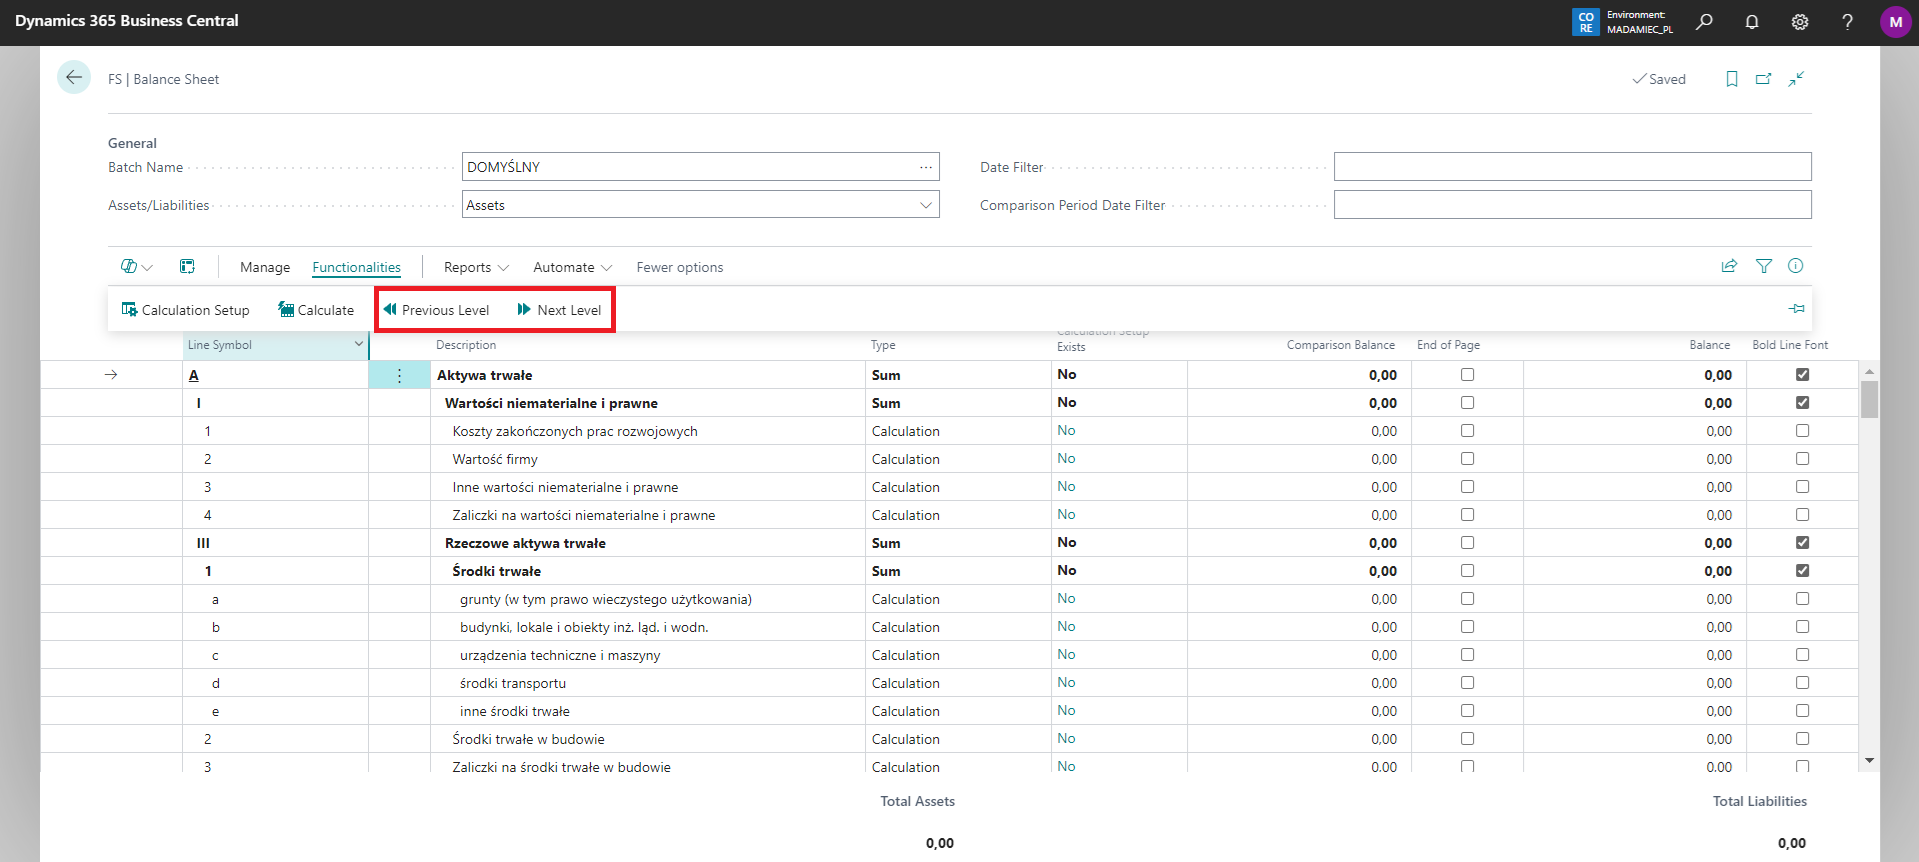
The next step is to prepare its structure. To do this, go to the Balance Sheet report.
A screen will be displayed, used to define the entire structure of the balance sheet and the calculation elements of its individual lines.
Tip
When opening the Balance Sheet, a check is performed to see if all accounts have been used. If not, a message will appear with the option to open the list of accounts that have been omitted.
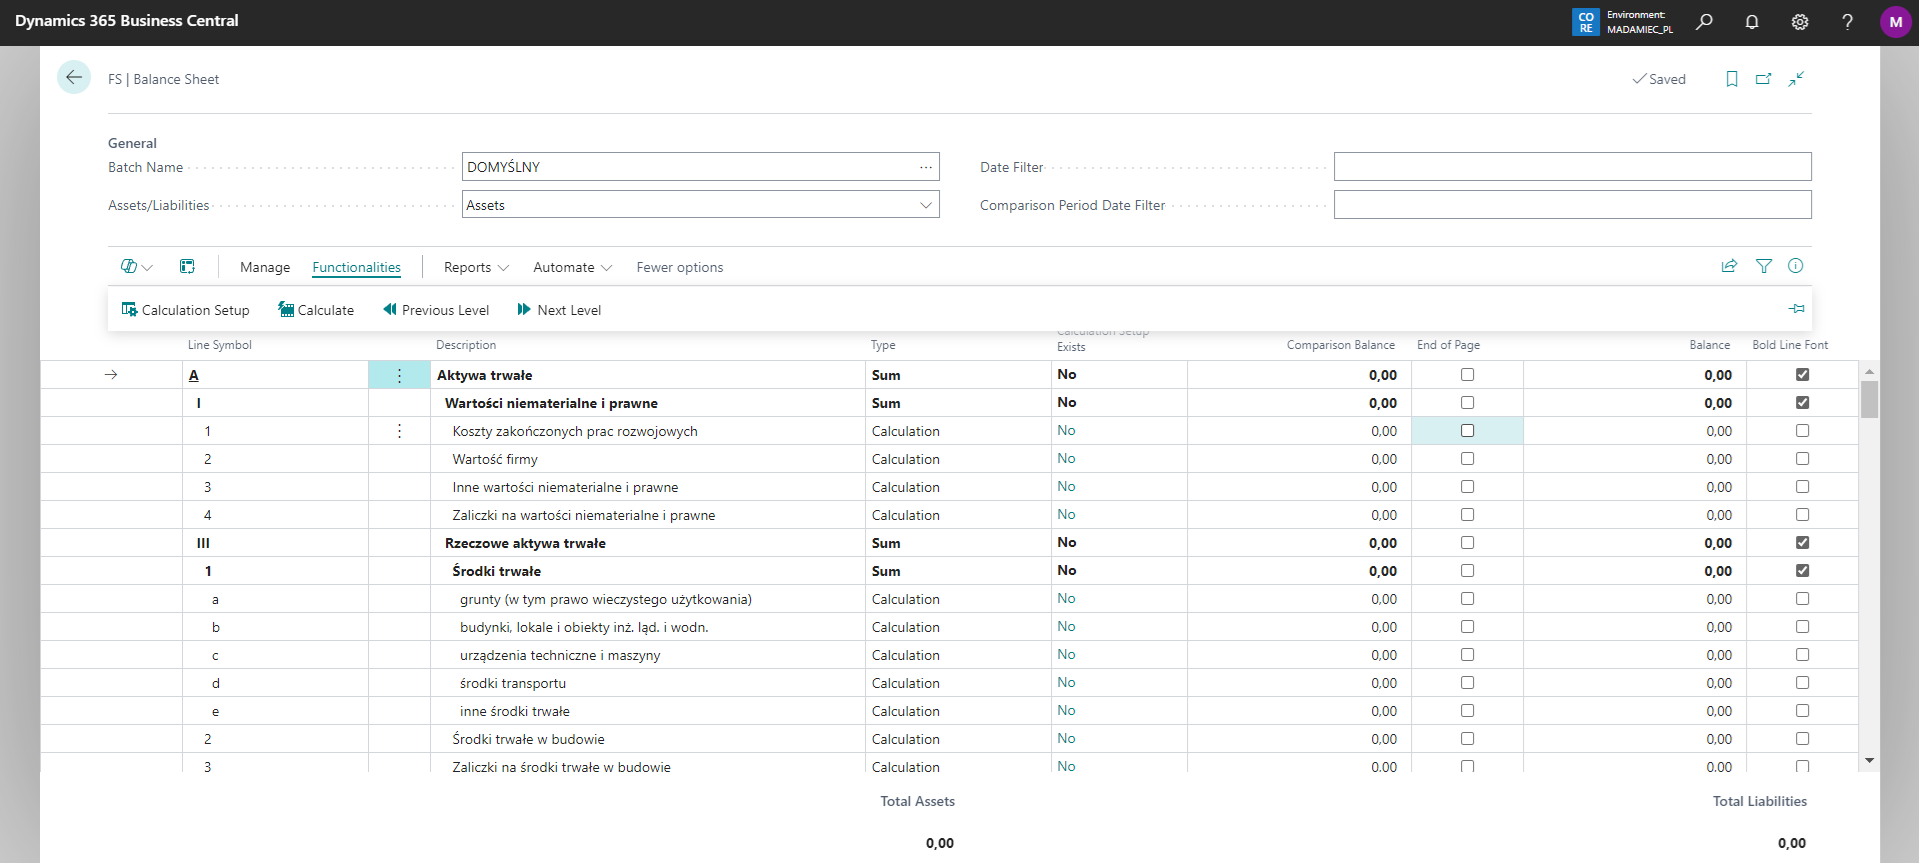
The following fields appear in the header section:
Batch Name – created batch name
Assets/Liabilities – allows you to go to the balance sheet lines on the Assets or Liabilities side
Date Filter – a filter that allows you to specify a date range for calculating values
Comparison Period Date filter – the filter of the period with which we want to compare the period indicated in the Date Filter
Other additional columns in the Balance Sheet:
End of page - the highlighted item will be the last line of the preceding page
Description 2 - additional column for description
Desc. when the amount is negative - when the column is completed, and the value of the line is negative, this description will be assigned to it
Desc. when the amount is negative 2 - as above
Hide - allows to hide the row on the printout
Bold Line Font - determines whether the line should have a bold font.
Adding lines
Balance Sheet lines are entered by using *New lines.
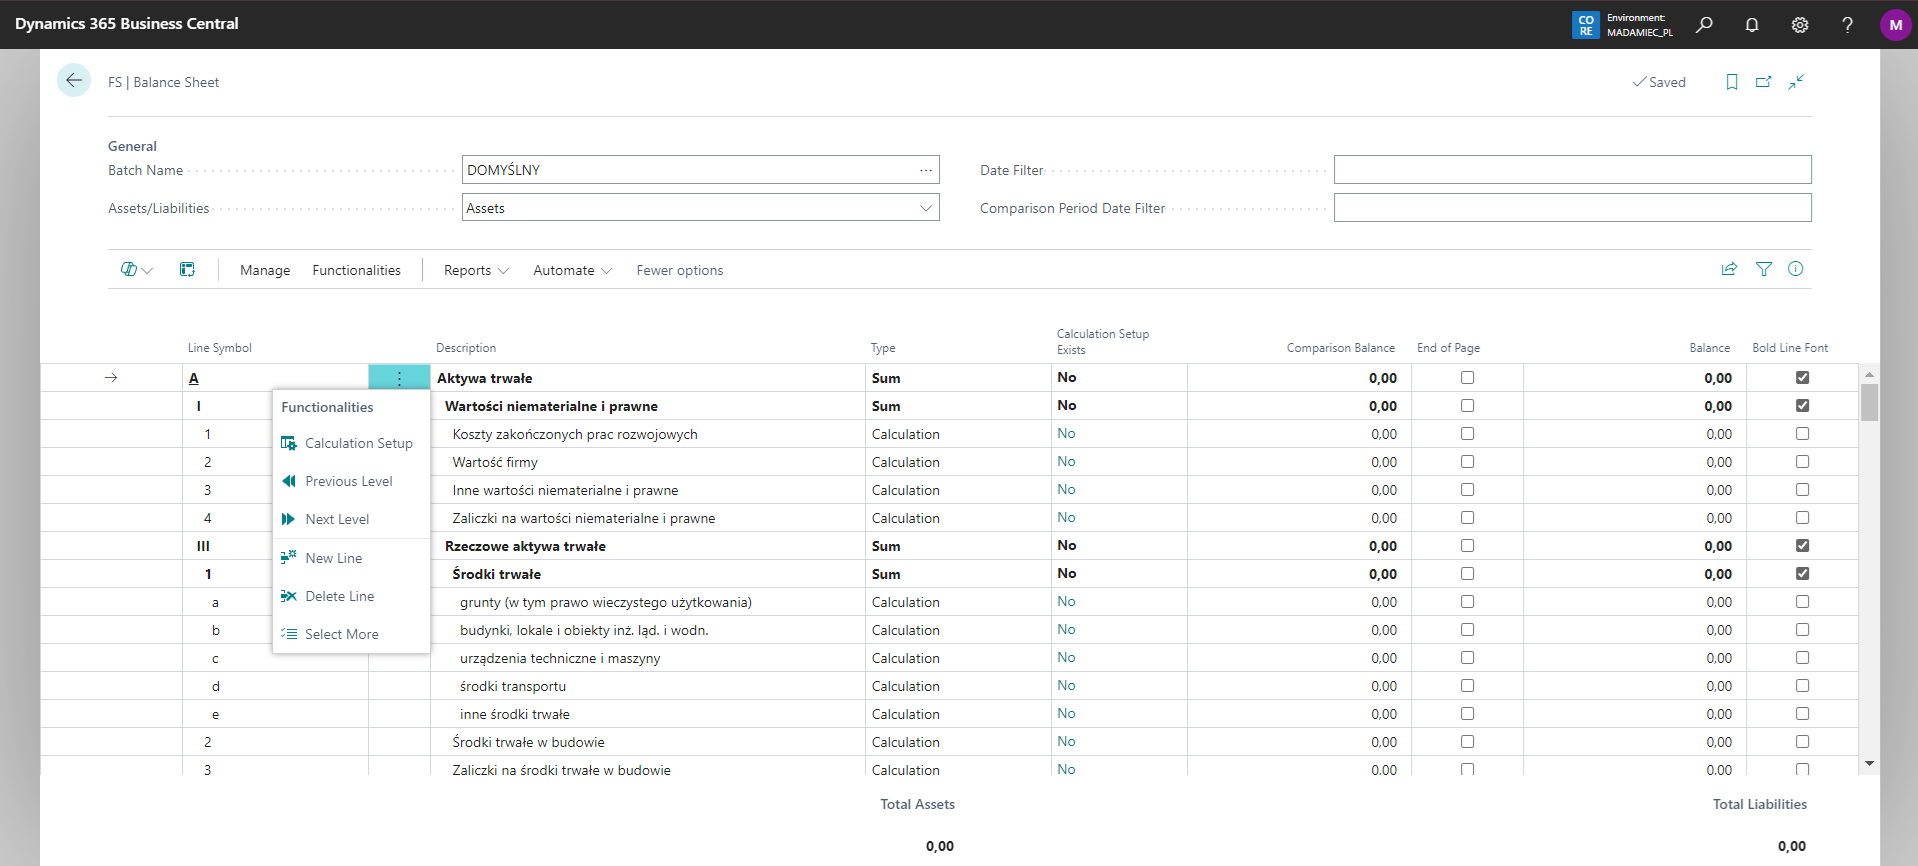
Warning
The created line will always form above the line from which the action is used.
Each line has a selected type, which defines the values reported on the balance sheet line. Available options:
Description – descriptive line, which isn't subject to calculation
Calculation – the value shown in this position is the result of a set calculation
Sum – sum of lines from subordinate levels
When selecting the Calculation type, preparing the appropriate calculation requires using the Calculation Settings action available on the action bar. If there are already calculation settings for the line in the column Calculation settings exist we have the value Yes. After navigating to the settings, a view will appear allowing you to adjust the given balance sheet line.

Meaning of fields:
Operation – the ability to indicate whether a calculation is to be a positive or negative operation
Source Type – specifying which source the system will use to show the calculation component:
G/L Account – reference directly to a single G/L Account
G/L Account Filter – reference to a range of G/L accounts defined by a filter expression (e.g.
401000..401999). All posting accounts matching the filter are automatically included in the calculation — new accounts added to the chart of accounts within the filter range are picked up without any changes to the setupBalance Sheet Line – reference to an already created balance sheet line
Profit & Loss Line – reference to the created line of the profit & loss account
Profit & Loss Name – indicate which profit and loss account variant the system should refer to (required if the 'profit and loss account line' type is selected - otherwise leave blank).
Source Code – based on the selected source type, indicate a specific account or a specific line. For the G/L Account Filter type, this field serves as a descriptive label (e.g. Accounts 401).
G/L Account Filter – available only for the G/L Account Filter source type. Enter a filter expression using BC syntax, e.g. 401000..401999 or 401000|402000..402999. You can use the assist button (...) to open the account list and select accounts — the filter will be built automatically.
Amount Type – the amount from the selected source that will be shown on the line:
Balance at Date
Customer Debit
Customer Credit
Vendor Debit
Vendor Credit
Negative Balance at Date
Positive Balance at Date
Note
One line can have multiple calculation components. At the bottom of the page, explanations of the types of amounts have been added.
Tip
To quickly add multiple G/L accounts to a single calculation line, use the Add Multiple G/L Accounts action on the action bar. Select any number of accounts from the list — each will be inserted as a separate calculation line with a + operation.
Changing the level to a higher (superior) or lower (subordinate) level is done by using the level change action available on the action bar.
Filtering by dimensions
In the solution, an option has been added to calculate the balance of the Balance Sheet according to the dimensions defined in the Filter totals by. Wanting to use this option, you need to define the appropriate dimension in the mentioned filter, and then use the Calculate action again. The balance of the Balance Sheet will be updated.