Additional Line Settings
In the Core Printout Setup, there is an option to configure fields from which information will be displayed below each line of a document. This applies to the following documents:
- Sales
- Service
- Purchase
- Transfers
- Warehouse
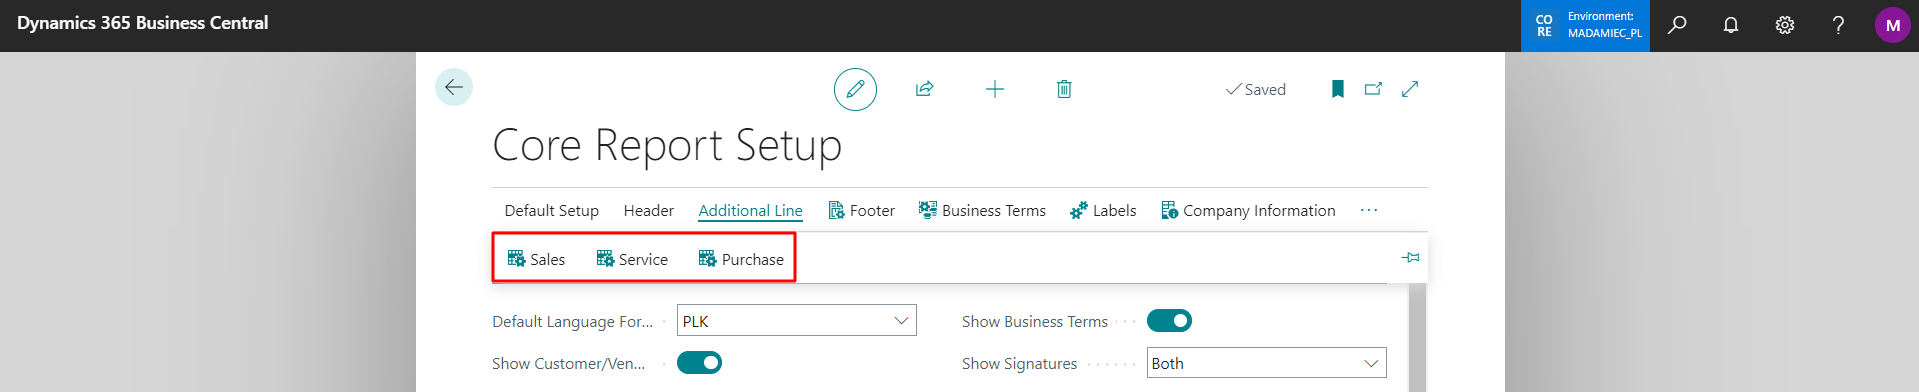
Configuring the Additional Line for a Document
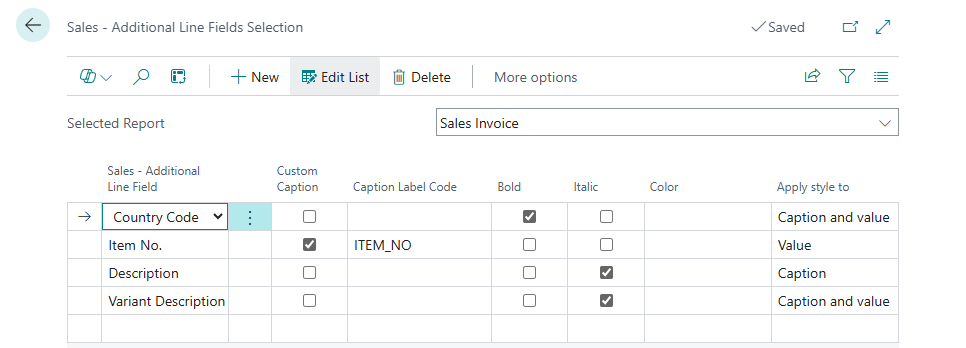
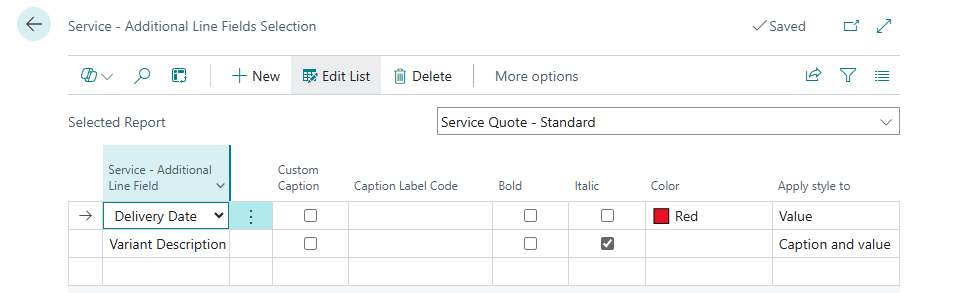
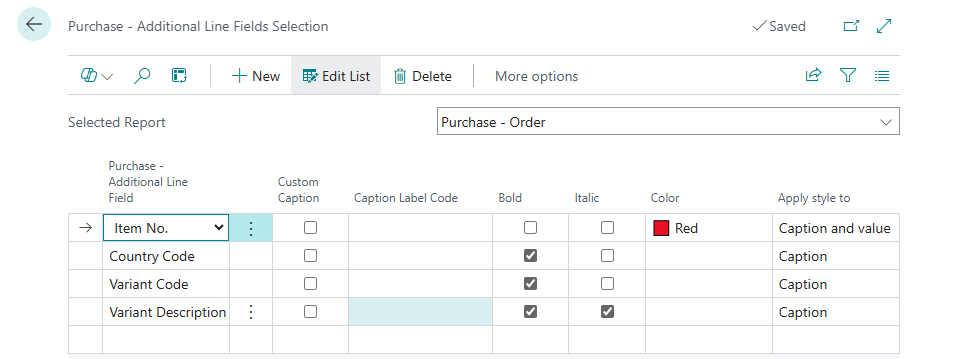
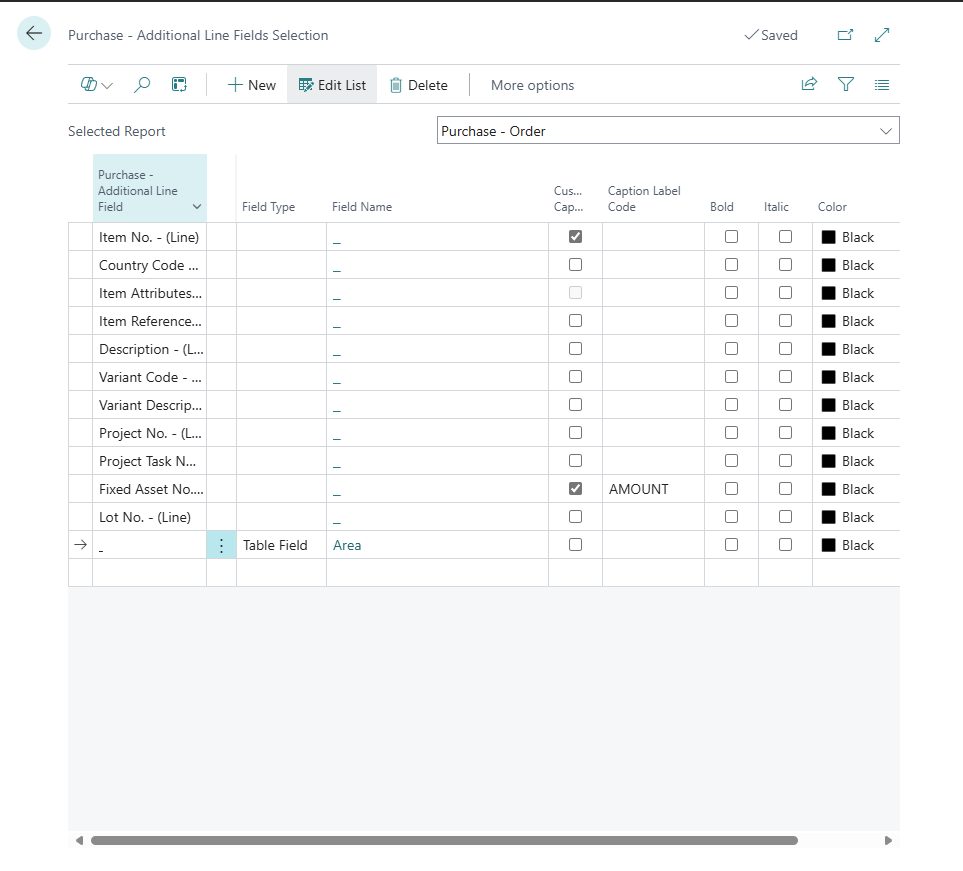
Here, you can set the fields for selected reports that should be displayed in the additional line in a specified order (the order follows the entry of fields). Standard field labels will be used as labels, but there is also an option to assign a custom label.
Sales:
Service:
Purchase:
Note
- There is no limit to the number of selected fields.
- If a defined field does not contain a value, it will be skipped during display.
- Selected fields will be displayed consecutively, separated by the "|" character.
Custom Field Support
The configuration view also includes columns that allow selection of the field type and its name.
If these fields (Field Type or Field Name) are not visible, they can be added using the Personalize feature in Business Central.
- Field Type – available options:
- Blank – inactive field
- Table Field – allows selecting a field from the document line table
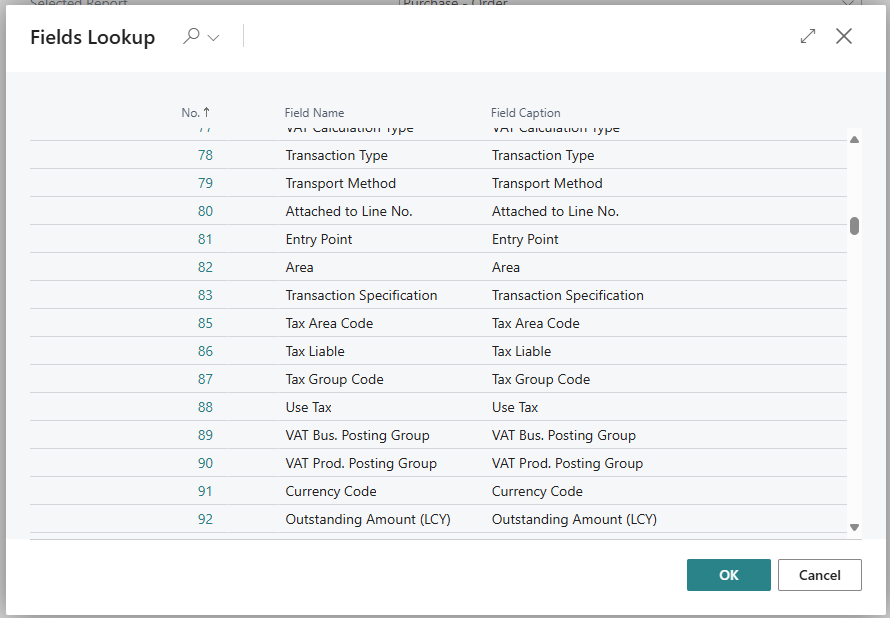
- Field Name – the list of available fields depends on the selected document type and its corresponding line table.
When Field Type is set to Table Field, clicking on the Field Name field opens a list of all fields from the relevant document line table (e.g. Sales Line, Purchase Line, Service Line). This list includes both standard and custom fields (e.g. added via extensions). You can select any of them to include it in the additional line, and it will be fetched and printed just like other fields.
Each selected field can also be assigned a custom label, which will be used on the printout instead of the default one.
Example configuration with a custom field:
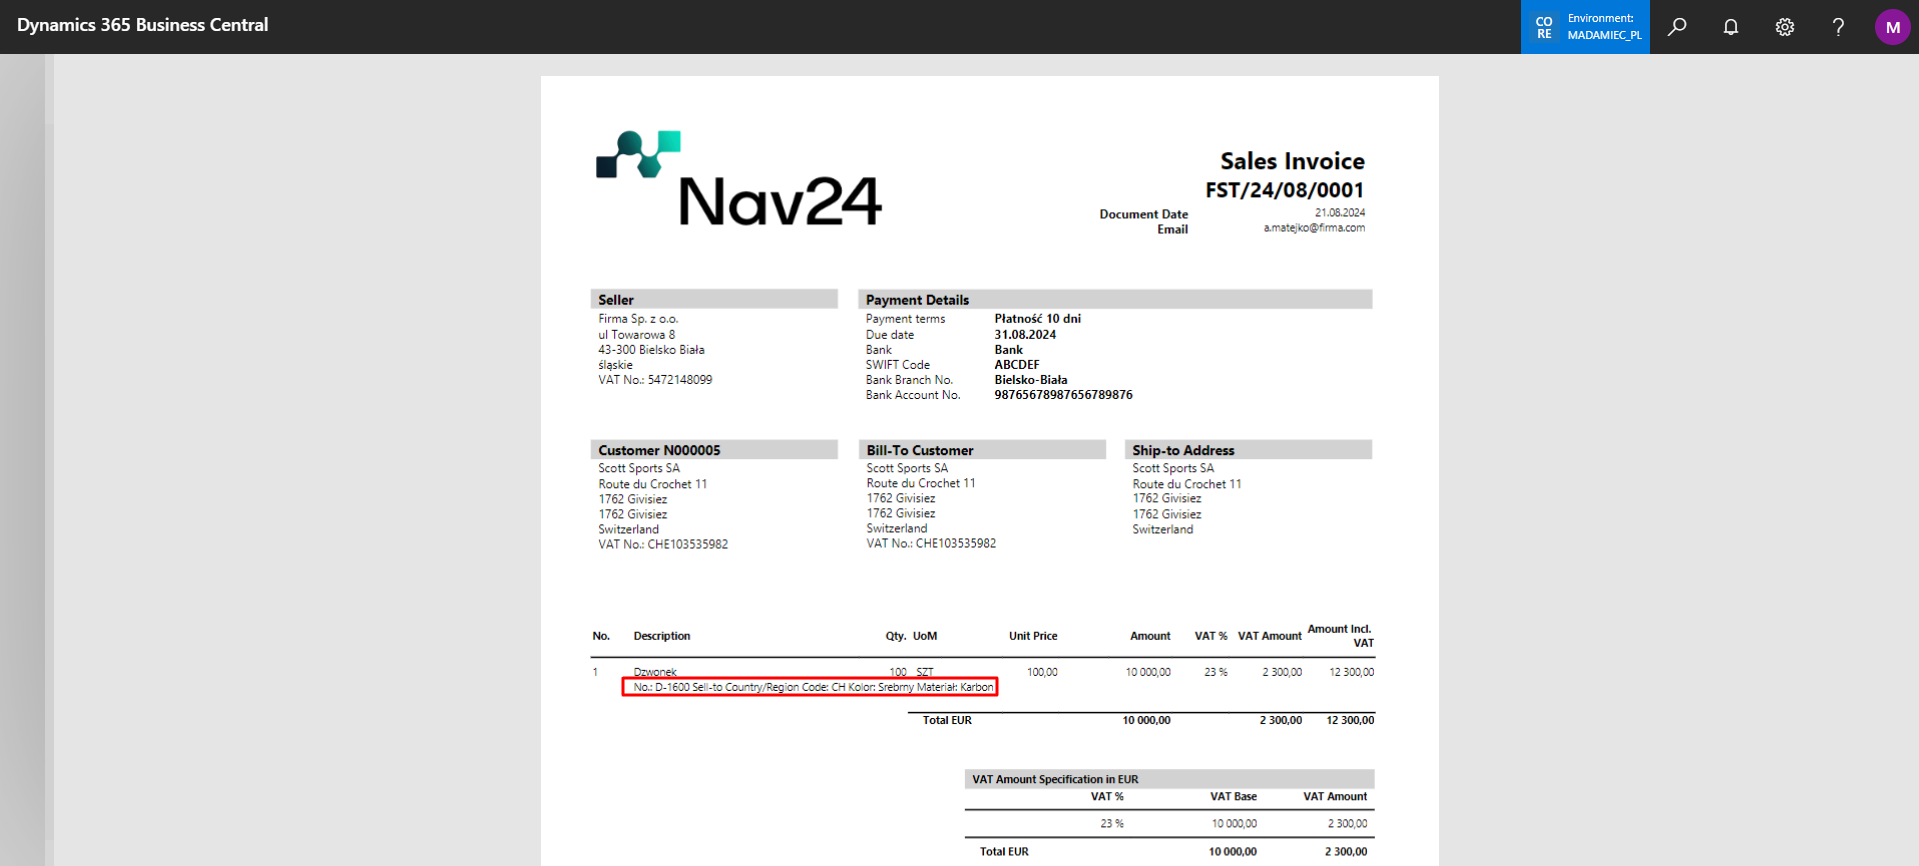
Below is a fragment of a sales invoice, showing the effect of selecting the appropriate fields on this document:
Examples and Scenarios
Scenario: Displaying EAN Code on Sales Invoice
Need: The customer wants each line of the sales invoice printout to show the product's EAN (barcode) code.
Configuration:
- Open the Core Printout Setup page.
- Select the Additional Line → Sales action. This opens the page where you can define additional information displayed on sales document lines.
- Select the Sales Invoice report.
- In the lines, set Field Type to Table Field, then click the Field Name field and select EAN from the list.
Result: The sales invoice printout will display the EAN code below each line with the label "EAN Code". If you want to use a custom label, select the Custom Caption field and add a new caption label with translations in the Caption Label Code field.
Important
In this configuration, the report displays the EAN code assigned directly to the invoice line. If multiple packages with different EAN codes (package numbers) were shipped within a single line, only one code will be displayed. Support for multiple EAN codes (package numbers) requires a report modification — currently, the report only supports displaying multiple values for Lot No. and Serial No..