How to customize your home page?
Customizing the home page is possible thanks to the personalization feature in Business Central. Below is a guide on how to set our page as the default and tailor it to your needs.
Setting our page as the default
To ensure our home page opens by default in Business Central, follow these steps:
Assign the N24 | Custom Role Center role to the selected users:
- Open User Settings, select a user, and click Manage → Edit from the action bar.
- Click ... next to the Role field and select N24 | Custom Role Center.
Once the role is assigned, the user will see a blank home page upon logging into Business Central, ready for customization.
Adding pre-made elements
The home page includes pre-configured sections that can be easily added:
- Navigate to the home page and click the gear icon in the top-right corner.
- Select the Personalize option and wait a few seconds for all elements to load.
- Hidden elements, marked with diagonal lines, can be added to the page:
- Click the desired element and then select Show.
- The lines will disappear, indicating that the element is now visible.

- To move sections, drag them to the desired location by holding the left mouse button on the red triangle. A red line will indicate the available drop zones.
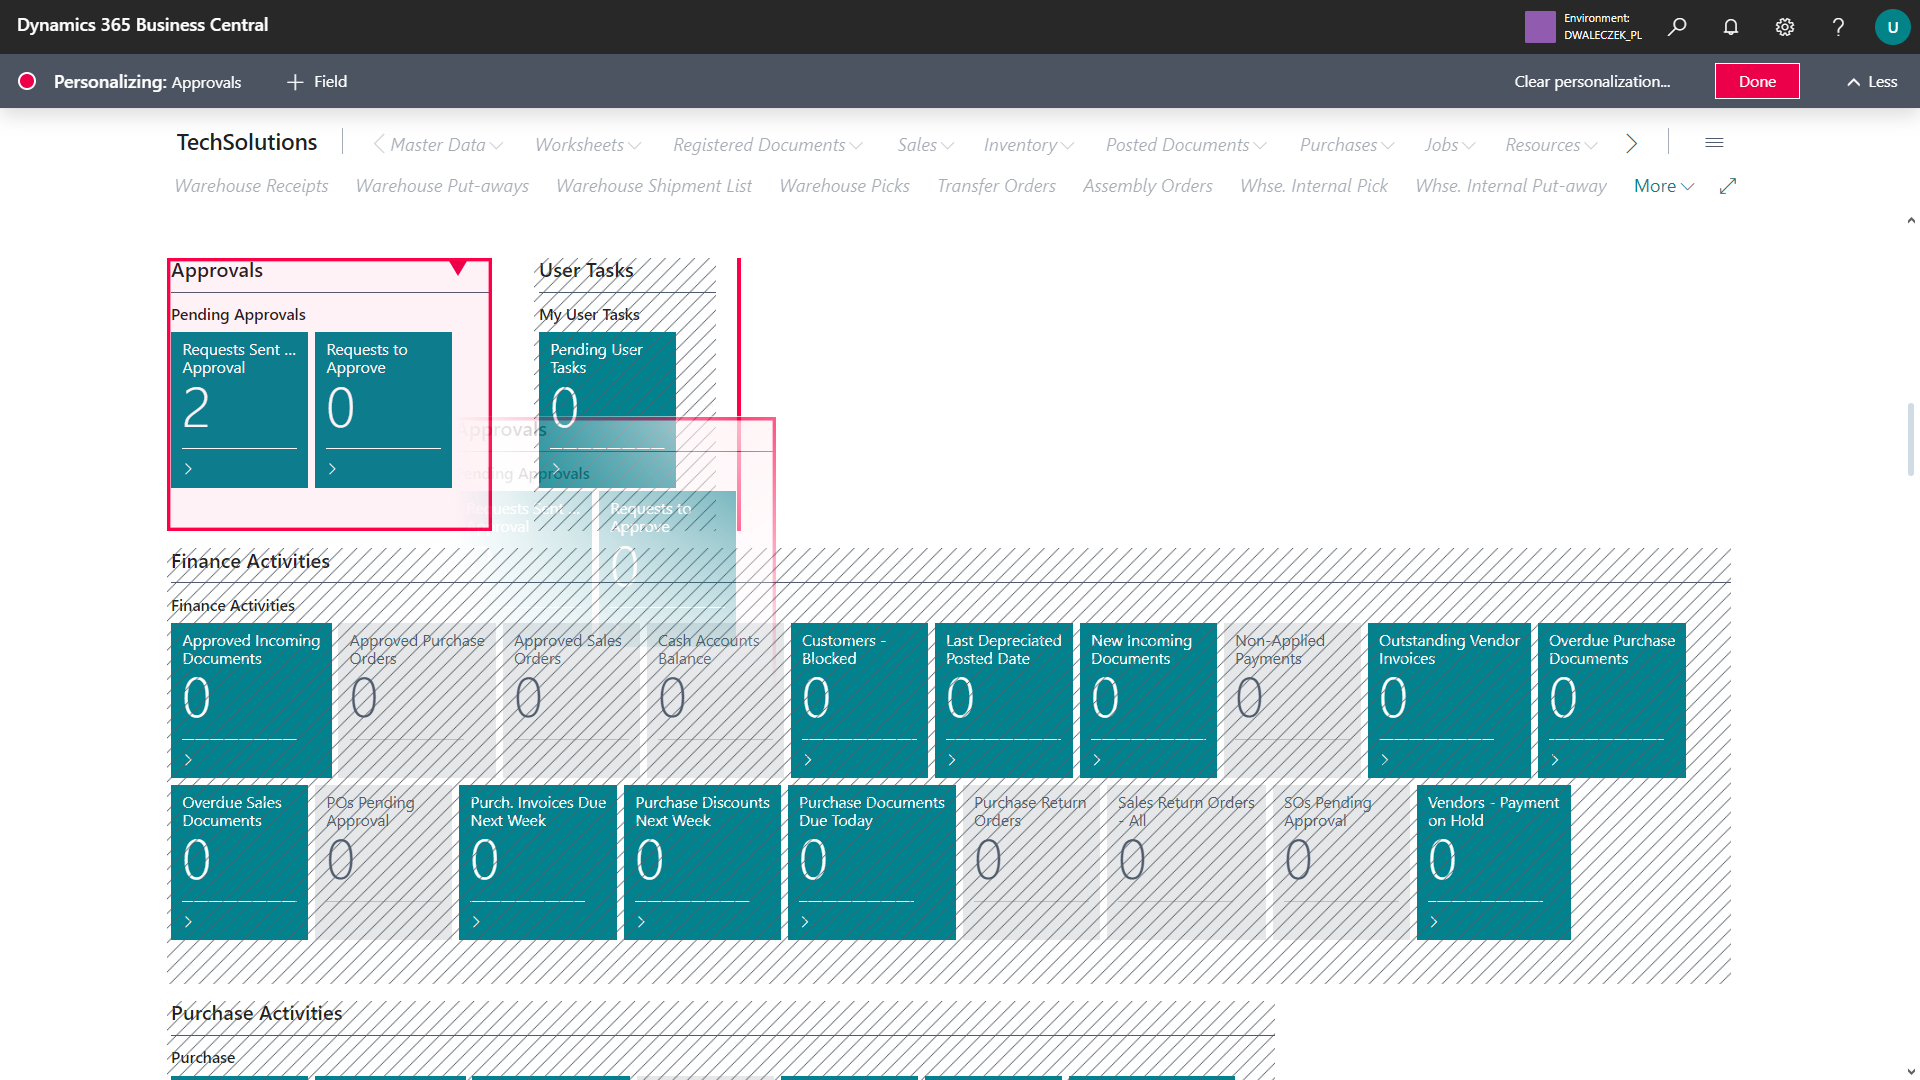
- When finished, click the red Done button to save the changes.
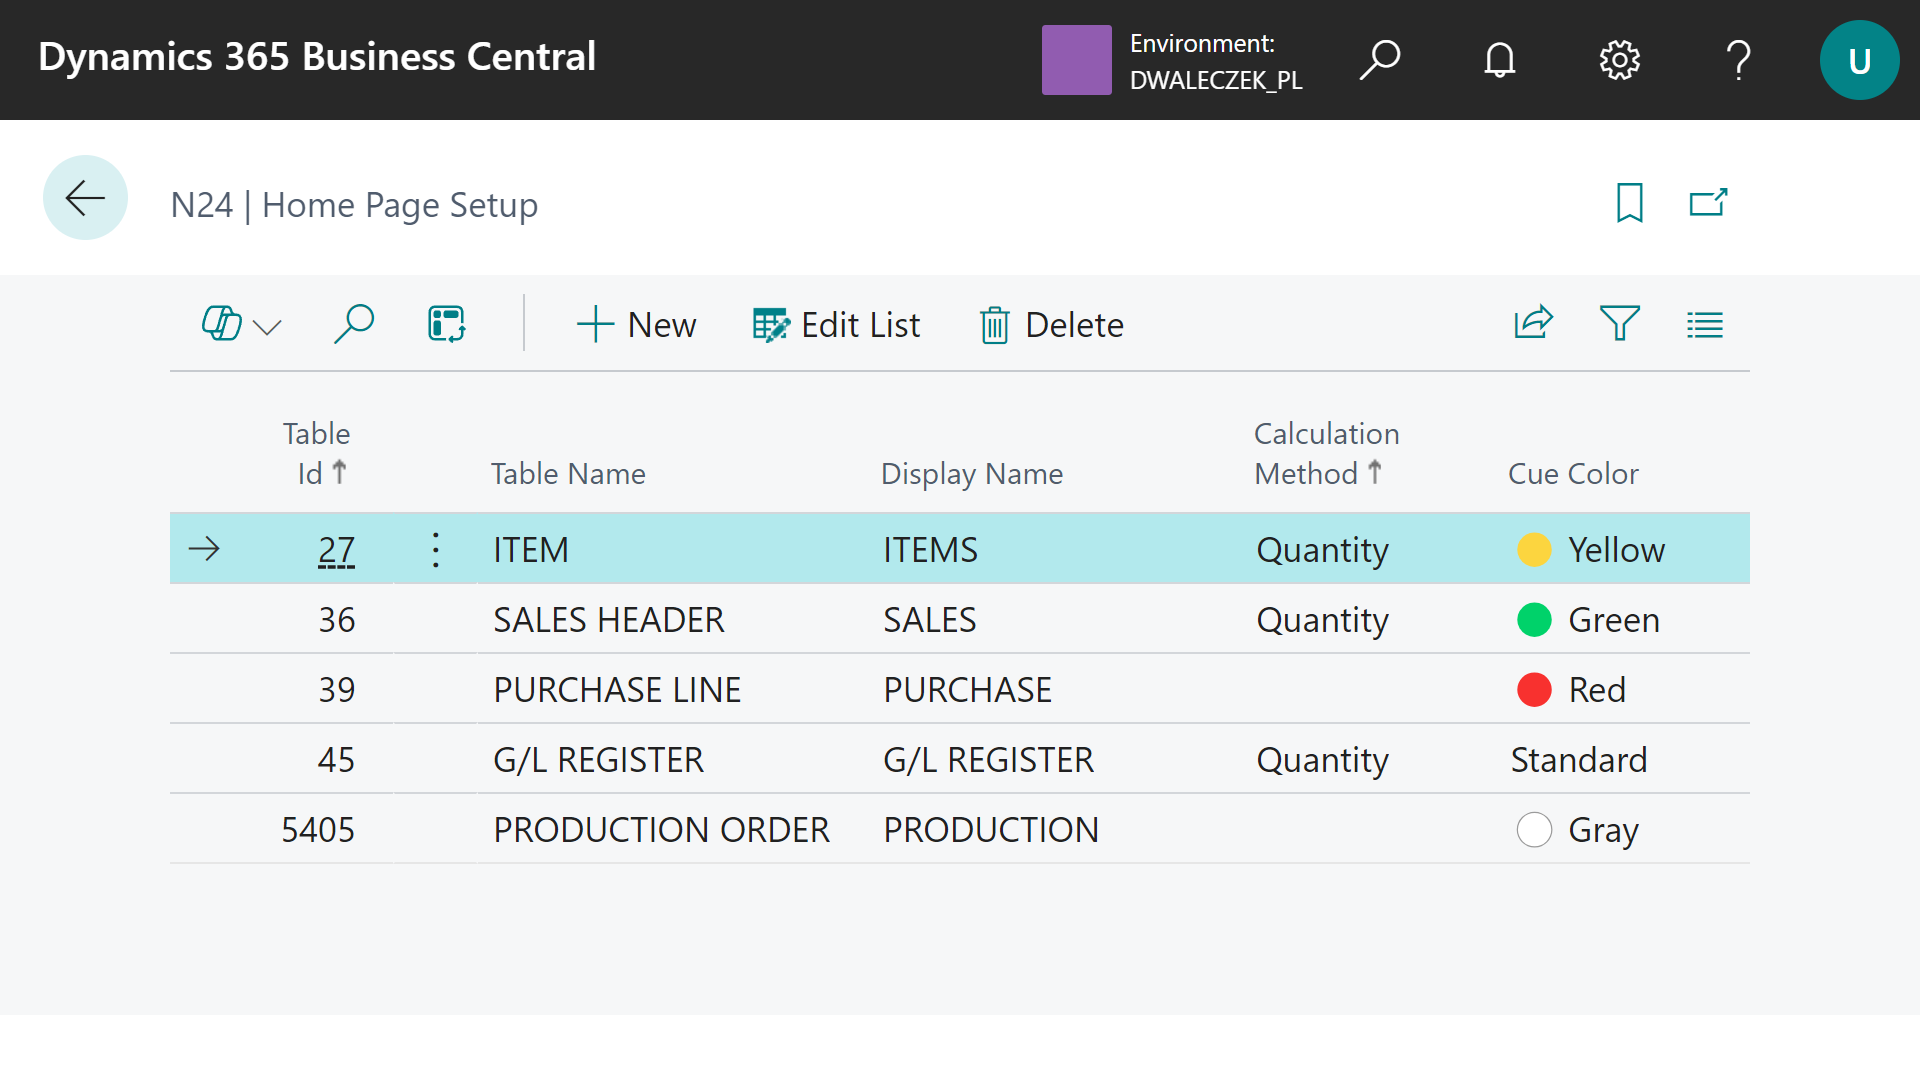
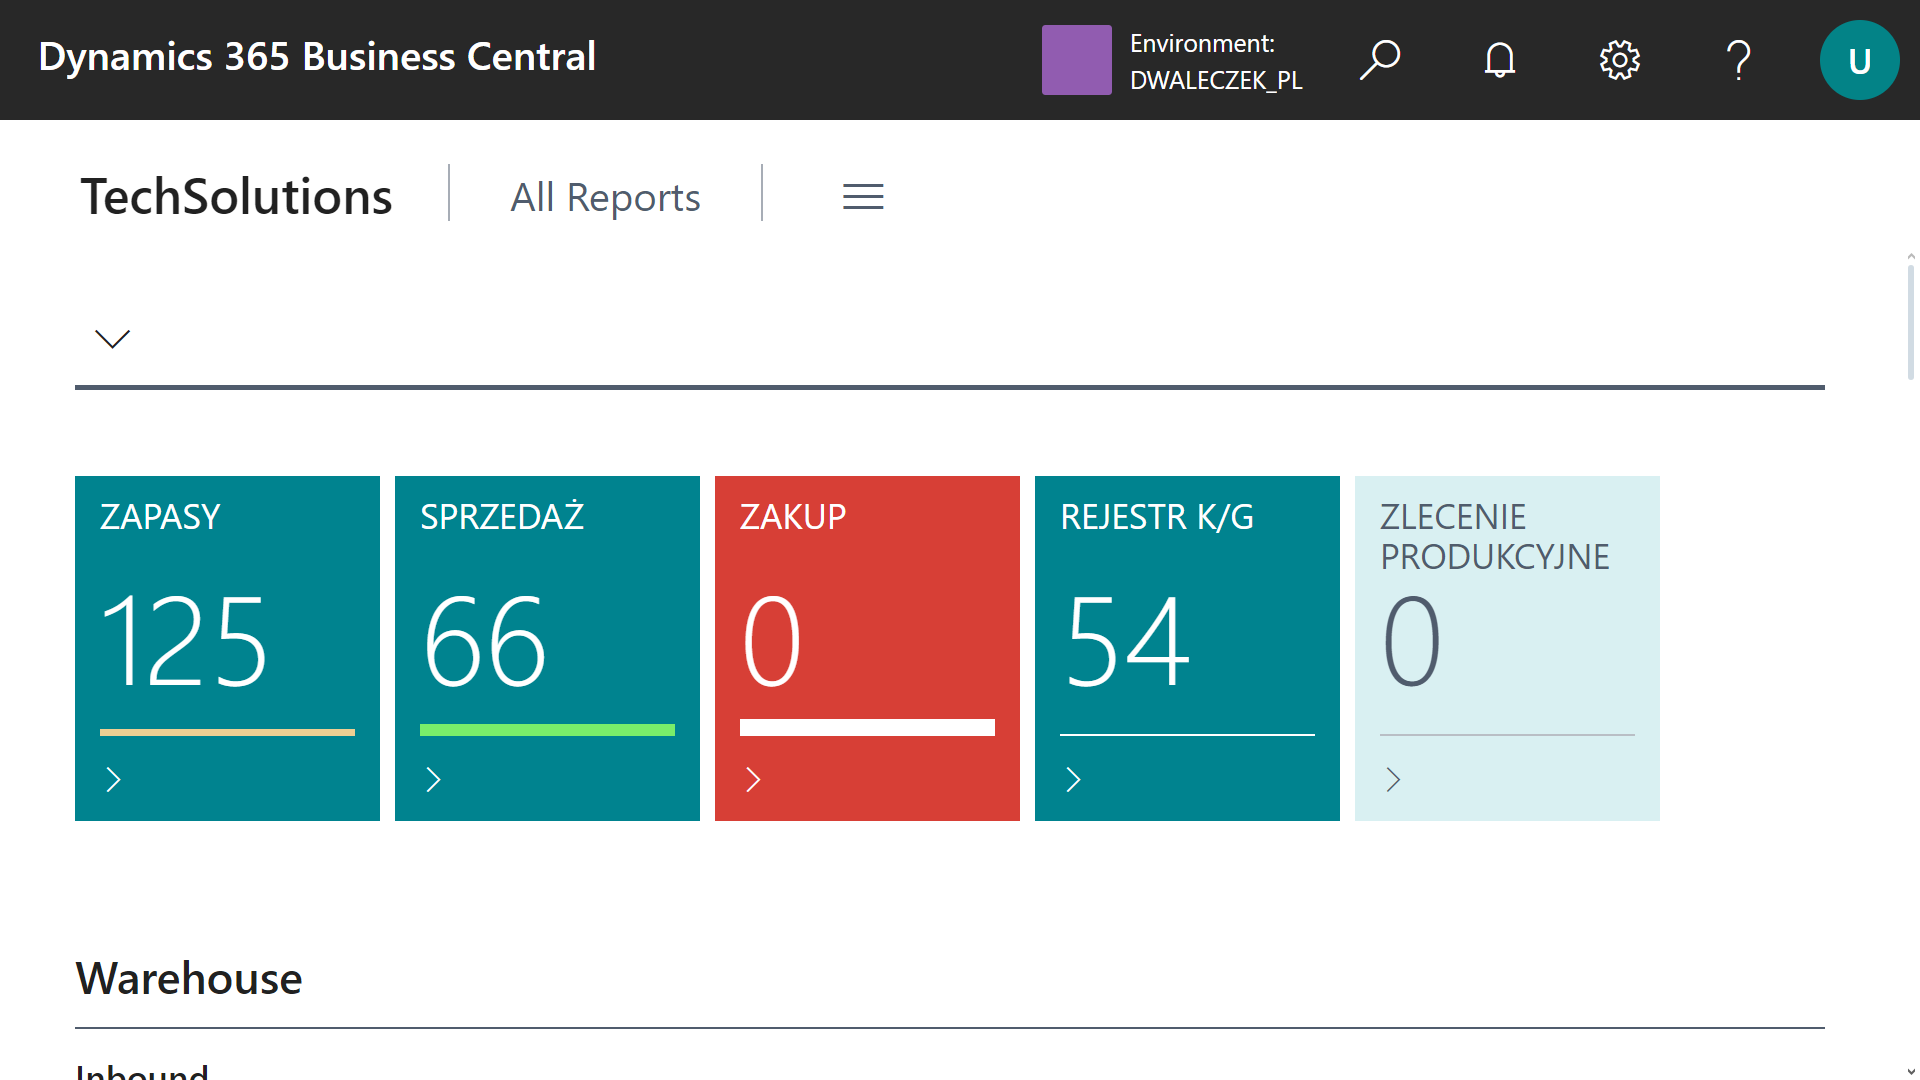
Adding custom tiles
You can add up to five custom tiles to the home page:
- Search for N24 | Home Page Setup in the search bar.
Tip
You can also access the setup page directly from the home page — click the Customize action in the custom tiles section.
- On the opened page, select the table whose data will be displayed.
- In the Name on the Role Center field, click to open the translations page. Add a display name for each language your users work in. The name will appear on the tile on the home page.
- In the Calculation Method field, choose the calculation method:
- Quantity — displays the total number of records in the table
- Sum — displays the sum of values from a selected field for all records
- Leaving the field empty will cause the tile not to be displayed.
- If you selected the Sum method:
- In the Field No. field, select a numeric field to be summed
- The Field Name field will automatically display the name of the selected field
- In the Table Filter field, you can specify additional filtering conditions for records (optional):
- Click in the field to open the standard Business Central filtering dialog
- Use the graphical interface to set filters on the selected table
- The dialog allows filtering by any fields from the table using standard BC operators
- In the Cue Color field, select a color:
- Standard — default color
- 🟢 Green
- 🔴 Red
- 🟡 Yellow
- ⚪ Gray
- Once configured, the tiles will appear on the home page.
Contact and support
If you need help with configuration or have questions about this module:
- Technical documentation: Check the help section in Business Central
- Technical support: Contact the Nav24 team