Breaks — Setup
Configure break schedules in N24SF - Break Schedules: add breaks with unique codes, names, start and end times, and activate them for automatic deduction.
🔓 Enabling the Module
Each module can be enabled or disabled at any time for any of your companies. Disabling a module hides all interface elements added by it. When a module is disabled, its functions become unavailable to users.
To enable a module
- Go to the N24SF - Shop Floor Setup page.
- Open the information panel on the right, where you'll find the
Modulessection.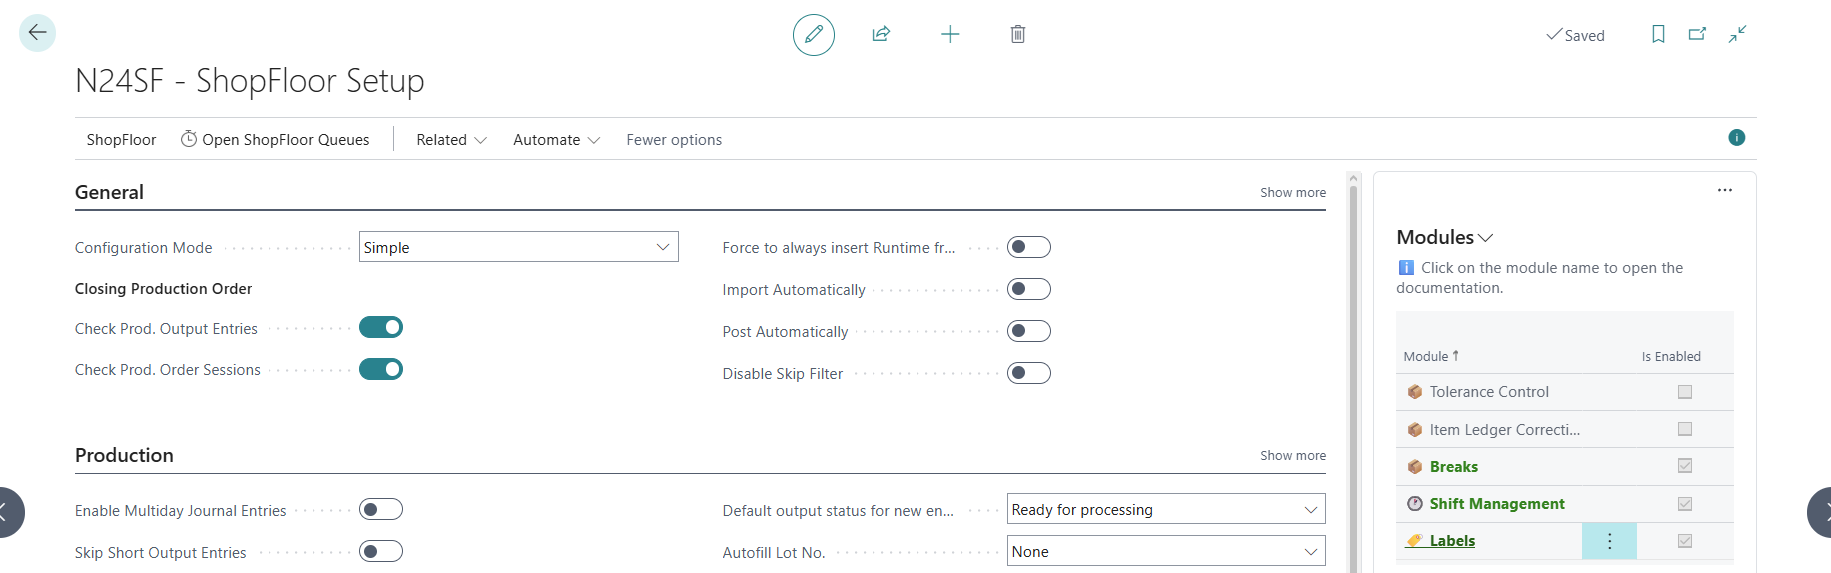
- Select any module from the list, then click
 .
. - From the action menu, select
Enable.
Additional information
- A module can be disabled in a similar way, using the action menu.
- Clicking on a module name will redirect you to the module's documentation page.
⚙️ Configuring the Break Schedule
- Open the N24SF - Break Schedules page.
- Add breaks applicable in your facility:
| Field | Description |
|---|---|
| Code | Unique break identifier (e.g., BRKFST, LUNCH) |
| Name | Break description (e.g., "Breakfast", "Lunch") |
| Start Time | Break start time |
| End Time | Break end time |
| Active | Check to include the break in calculations |
Example Configuration
| Code | Name | Start Time | End Time | Active |
|---|---|---|---|---|
| BRKFST | Breakfast | 09:00 | 09:15 | ✓ |
| LUNCH | Lunch | 12:00 | 12:30 | ✓ |
| NIGHT | Night Break | 02:00 | 02:15 | ✓ |
Tip
You can deactivate a break at any time by unchecking the Active field. The break will remain in the schedule but will not be deducted from work time.
ℹ️ Additional Information
- Break deduction is applied automatically during production entry processing — no additional action is required from the operator.
- If no active break overlaps with the entry time, work time remains unchanged.
- Details of deducted breaks are stored in the Break Details field of the production entry, enabling easy tracking of applied deductions.