Entry Correction
Reverse incorrect output or consumption entries quickly to protect inventory accuracy.
After enabling this module, you gain the ability to correct item ledger entries of type Output and Consumption. The correction creates a new item ledger entry with the opposite quantity compared to the corrected entry.
❓ How to correct an entry?
Correcting an entry of type Output or Consumption is extremely simple. To perform a correction:
- Make sure the module is enabled. See 🔓 How to enable the module.
- Open the BC:Item Ledger Entries page.
- Select an entry of type Output or Consumption. You can easily filter entries using the
Shop Floor Entriesview: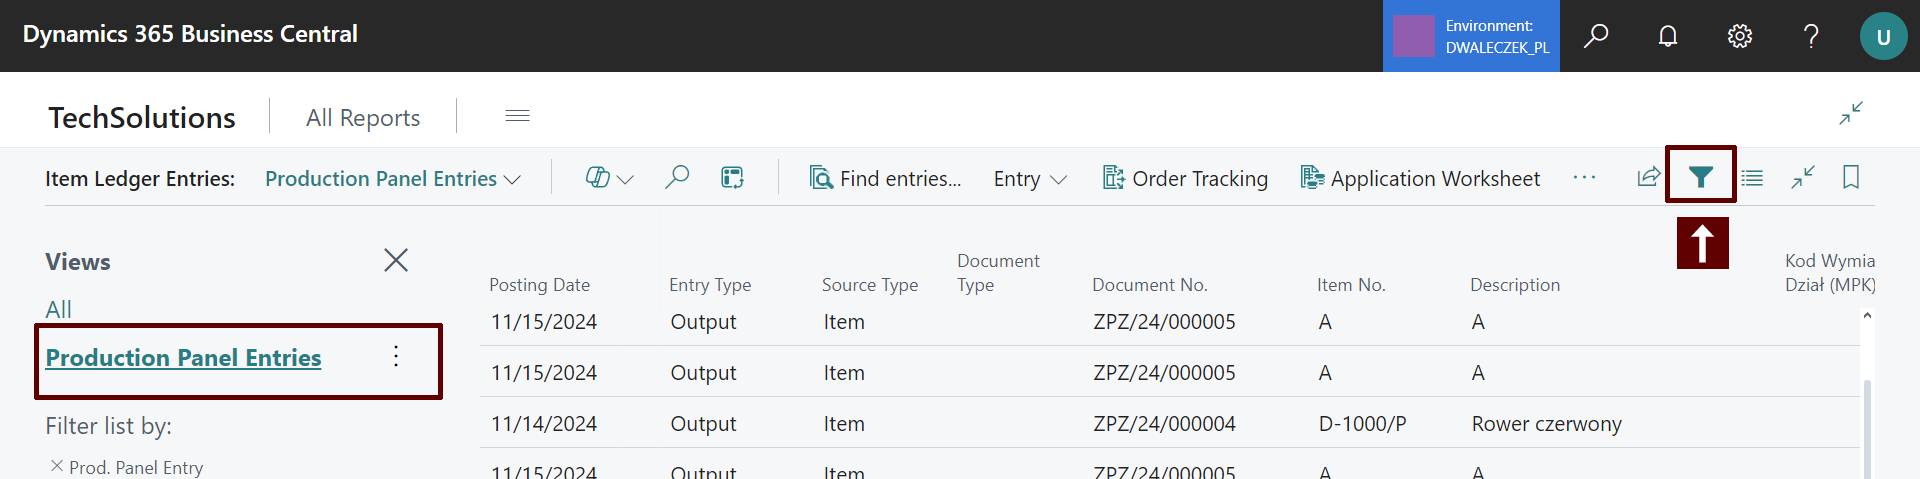
- Then click
 and in the actions menu select Correct Entry
  .
. - Read the message informing about correction details. After confirmation, the system will perform the correction.
⚙️ How does the process work in the system?
During correction, a new entry is created in the appropriate journal:
- If the entry is related to Output, the new entry goes to the production journal.
- If the entry is related to Consumption, the new entry appears in the consumption journal.
The new entry inherits most fields from the original item ledger entry, except for the Quantity and Unit Time fields, which take the opposite value.
Note
The table illustrates the process of correcting an entry in the item ledger. The original entry has a quantity of 12 and a unit time of 4. A new journal line is created with opposite values: quantity -12 and unit time -4. This ensures that the quantity and associated time are properly corrected.
| Record | Quantity | Unit Time |
|---|---|---|
| Item ledger entry | 12 | 4 |
| Created journal line | -12 | -4 |
🎯 Which entries can be corrected?
Correction applies only to entries of type Output and Consumption.
👤 Who can correct entries?
Entries can only be corrected by people with N24SF ADMIN permissions.
🔓 How to enable the module?
Each module can be enabled or disabled at any time for any of your companies. Disabling a module hides all interface elements added by it. When a module is disabled, its functions become unavailable to users.
To enable a module
- Go to the N24SF - Shop Floor Setup page.
- Open the information panel on the right, where you'll find the
Modulessection.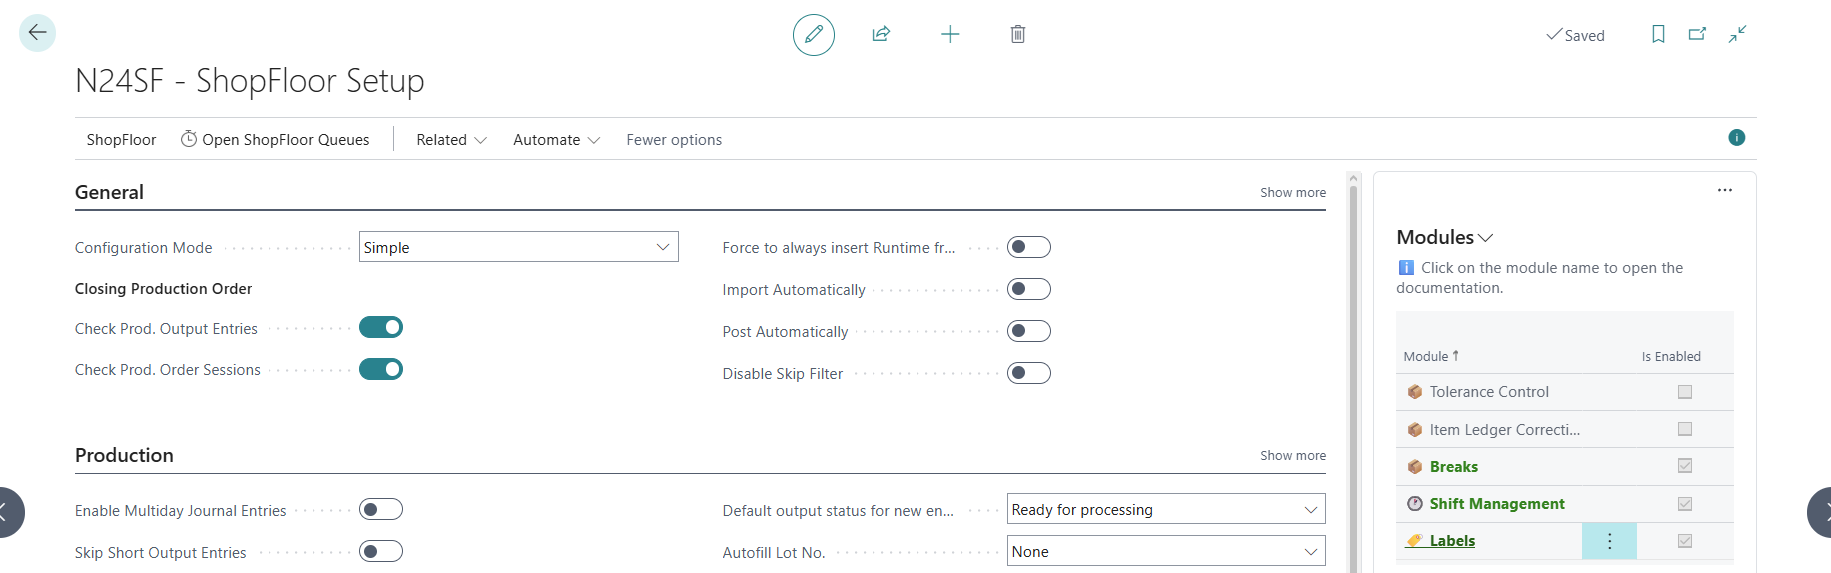
- Select any module from the list, then click
 .
. - From the action menu, select
Enable.
Additional information
- A module can be disabled in a similar way, using the action menu.
- Clicking on a module name will redirect you to the module's documentation page.